Once triages are promoted to Incidents, they can be managed via the Incident dashboard.
1 Incident Dashboard overview
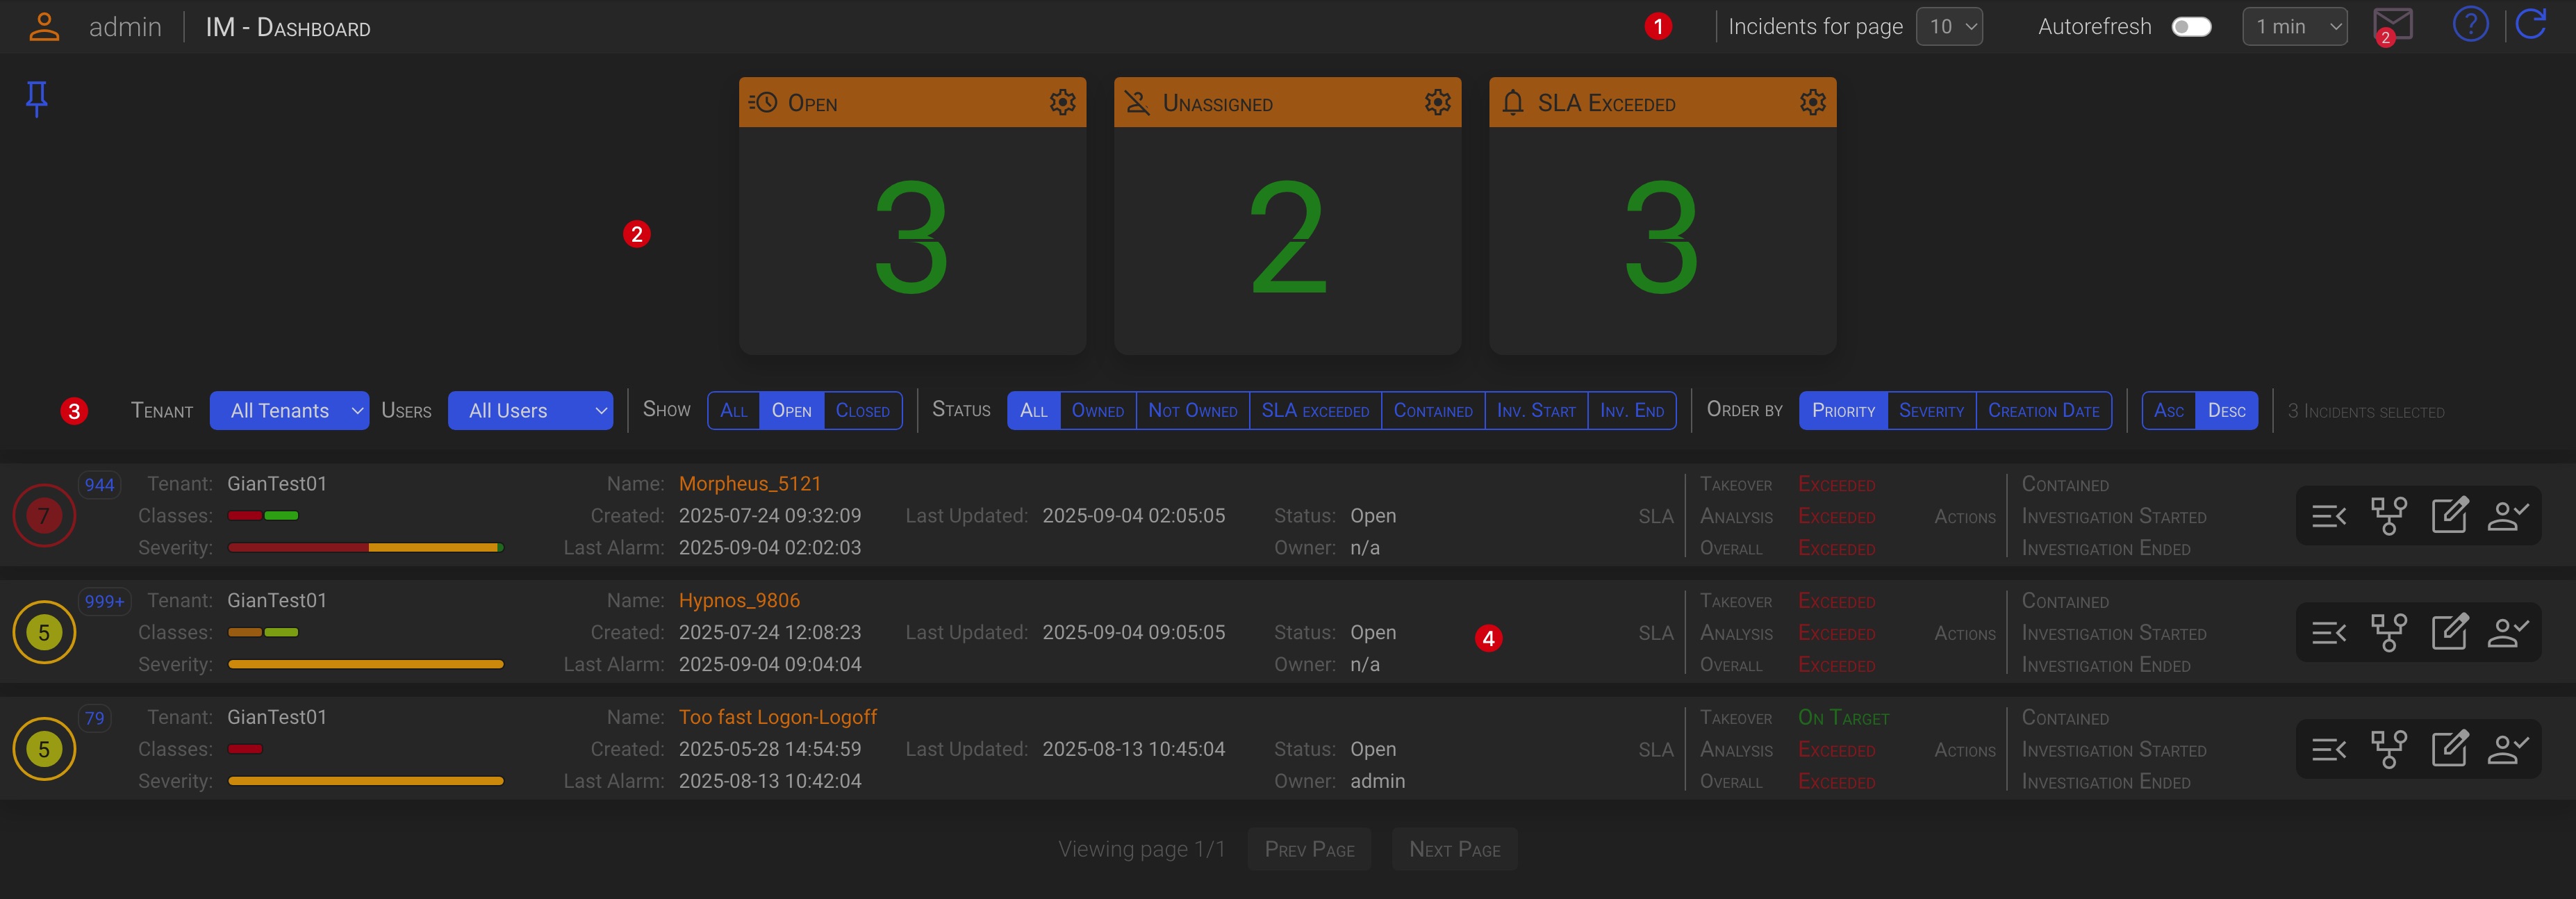
The Incident Dashboard is split into four main areas:
1.1 The Header section (1)
Here you can set the general dashboard behavior and read your messages.
- Incidents for page Allows you to set the number of incident you want to see on a dashboard page.
- Autorefresh Allows you to turn on the dashboard auto-refresh and set the refresh interval.
- Messages By clicking the envelope icon, you can read messages sent to your account by backend processes, such as SLA expiration or other operational messages.
Tip
Click the envelope icon to toggle messages display.
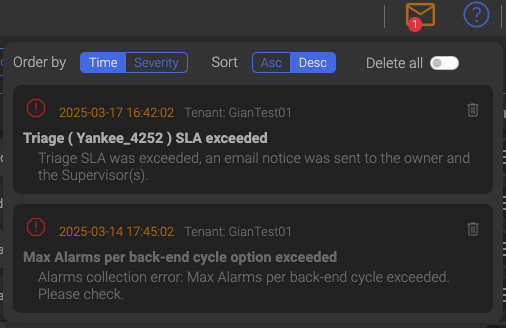
Messages actions
- Order by creation time or message severity (ascending or descending)
- Delete single messages
- Delete all messages
The number on the envelope icon represent the number of unread messages, when red, and the number of read messages when grey.
TIP
The backend processes automatically remove already read messages that are older than one day and unread messages that are older than three days, since the information contained in messages is closely related to the time of their creation.
1.2 The Cards section (2)
In the Cards section, operators can check the overall incidents status. Each card displays the number of incidents indicated by its title. The color of the counter indicates whether the number of incidents in the indicated state, exceeds the defined threshold. A green counter indicates that the number of incidents in the specified state is below the low threshold. A yellow counter indicates that the number of incidents is between the low and the high thresholds. A red counter means that the number of incidents has exceeded the high threshold.
To configure the card’s thresholds, click the gear icon in the top right corner of the card. Then, slide the controls to set the new threshold and click the Save button to apply the changes.

If needed, click the blue pin icon in the upper left corner of the Cards section to toggle the view and free up space on the dashboard.

TIP
The cards’ incident counters are updated automatically each time the dashboard is refreshed.
1.3 The Filters section (3)
In the Filter section, you can select which alarms you want to see and the order in which they are displayed.

1.3.1 General Filters (1)
- Tenant You can choose which Tenant’s incidents you want to see.
- Users You can choose which User’s alarms you want to see.
1.3.2 Show Filter (2)
Allows you to select which incident you want to see.
The following Show filters are available:
-
All All incidents will be displayed.
-
Open Only open incidents will be displayed.
-
Closed Only closed incidents will be displayed.
1.3.3 Status Filter (3)
Allows to apply an and condition to the Show filter.
Example
To see all open, unassigned incidents, select Open in the Show filter and Not Owned in the Status filter.
So, within the incidents previously selected by the Show filter, you can apply one of the following Status filters:
- All Regardless of their status, all incidents will be displayed.
- Owned Only incidents that was taken in charge by an operator will be displayed.
- Not Owned Only incidents not yet taken in charge by an operator will be displayed.
- SLA Exceeded Only incidents that have exceeded their SLAs will be displayed.
- Contained Only incidents that was contained will be displayed.
- Inv. Start Only incidents whose investigation has been started will be displayed.
- Inv. End Only incidents whose investigation was ended will be displayed.
1.3.4 Order by (4)
Here you can select how to order the current Incident view.
- Priority Incidents will be ordered by Priority
- Severity Incidents will be ordered by Severity
- Event Time Incidents will be ordered by Event Time
1.3.5 Selected Incidents (5)
Here you can see how many incidents are matching your selection criteria.
1.4 The Incidents section (4)
The Incidents section contains the list of the incidents matching your selection.

An Incident row is split into six sections:
1.4.1 Section 1
This section contains the following information:
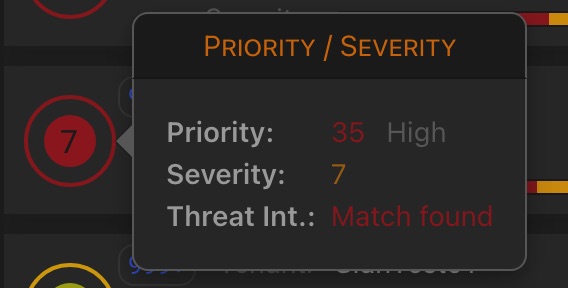
- The external circle color represent the incident Priority (as defined in priorities configuration).
- The inner circle contains the incident Severity value and is filled with a color gradient ranging from green to red that also represents the severity value.
- The blue number in the upper right corner shows how many alarms are associated with the incident. This number increases if the system detects new alarms that match the key of an open incident.
Hover over the circles to display a pop-up with the details.
TIP
- The incident priority equals the highest priority of its alarms, the same logic applies to the incident severity.
- A red, flashing inner circle indicates that the incident contains one or more alarms that match a threat intelligence rule.
1.4.2 Section 2
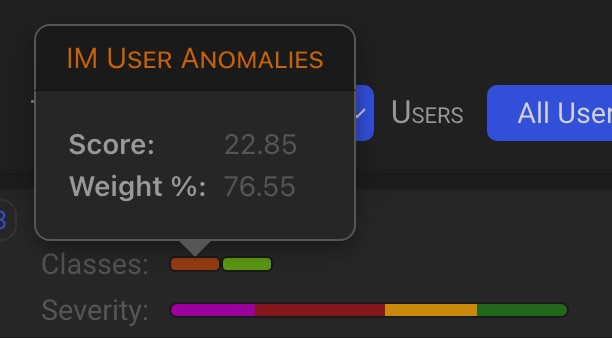
This section contains the following information:
- The incident tenant name
- This is a representation of the SGBox classes involved in the incident, as well as their respective scores and weights relative to the incident.
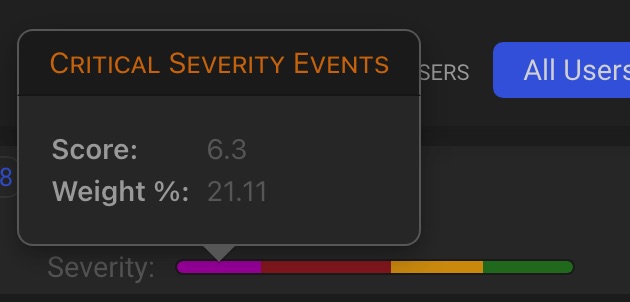
- This shows how severity is distributed among an incident’s alarms, as well as their respective scores and weights relative to the incident.
Hover over a class segment or a severity segment to display a pop-up with the details.
1.4.3 Section 3
This section contains general incident information.
| Header | Description |
|---|---|
| Name | Incident Name |
| Created | Incident creation date time |
| Last Alarm | The date and time of the last alarm added to the incident |
| Last Updated | This is the last date and time that the incident was updated by either the backend or a user action |
| Closed | The date and time the incident was closed |
| Status | The incident current status |
| Owner | This is the name of the user who took over or claimed the triage. |
TIP
The system automatically adds new alarms to an incident when it detects a match with the key of an open incident.
1.4.4 Section 4
This section contains the SLA statuses of the incident: On Target or Exceeded, as well as the time remaining based on the SLA times defined in the SLA Configuration panel.
1.4.5 Section 5
This section shows the progress status of the incident’s actions. Completed actions turn green.
1.4.6 Section 6
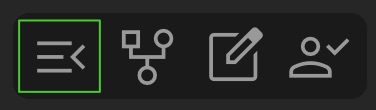
This section contains the available actions.
2 Incident dashboard actions
There are four actions that can be taken against an incident:
- Take Over
- Analyze
- Incident Chart
- Manage
2.1 Take Over

Clicking on the Takeover button allows you to take over an incident, or claim one that was already taken over by another operator.
Depending on whether the triage has already been assigned, the action button will change to allow you to take the appropriate action: Take Over 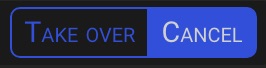 or Claim
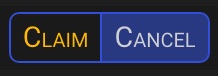
TIP
If you are not the owner of the triage, you can only browse its details. You will not be able to perform any of the actions available in the Triage Detail panel.
NOTE
Take Over and Claim actions will be logged in the triage history as well as all other actions.
2.2 Analyze
Clicking on the Open Details button allows you to investigate the incident. Incident Details panel will open with the incident statistics tab open by default.
The Incident Detail tabs menu is split in to two sections:
- General contains tabs that provide general information about the incident.
- Aggregates contains tabs that provide aggregated view of incident parameters
2.2.1 General Tabs
2.2.1.1 Statistics
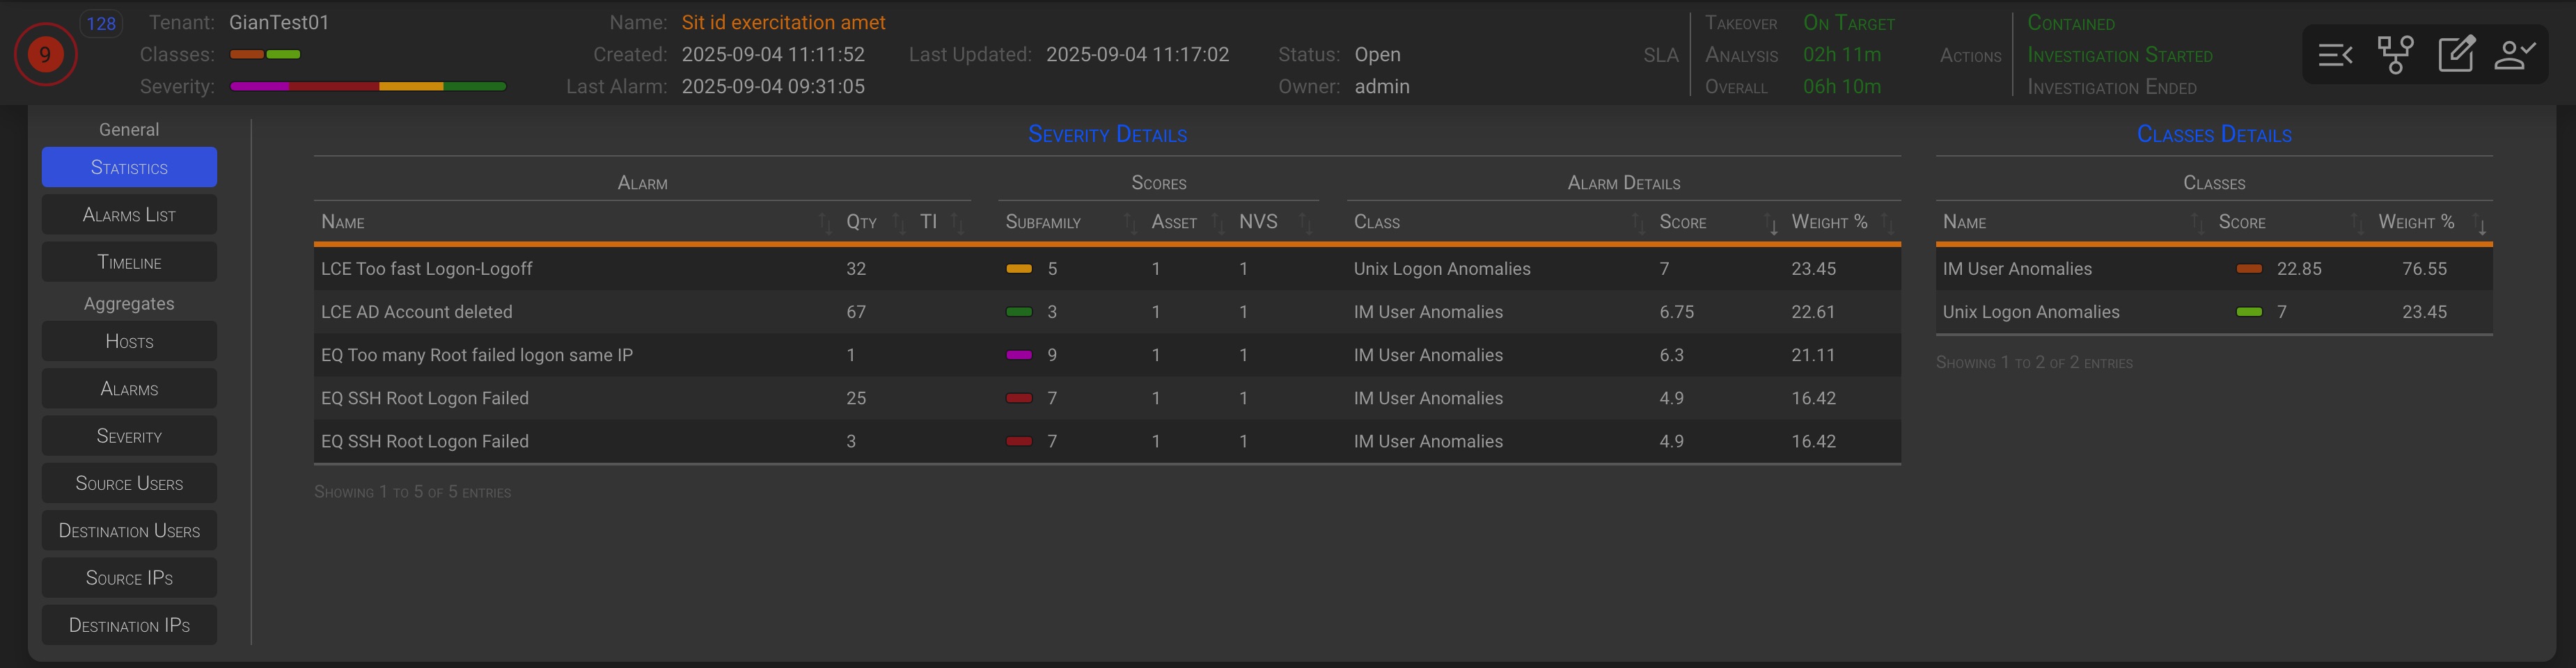
This panel provides a detailed view of the distribution of event classes and severities, as well as their respective scores and percentage weight among the incident’s alarms. In practice, it offers a detailed view of the colored bars representing classes and severity in the incident row.
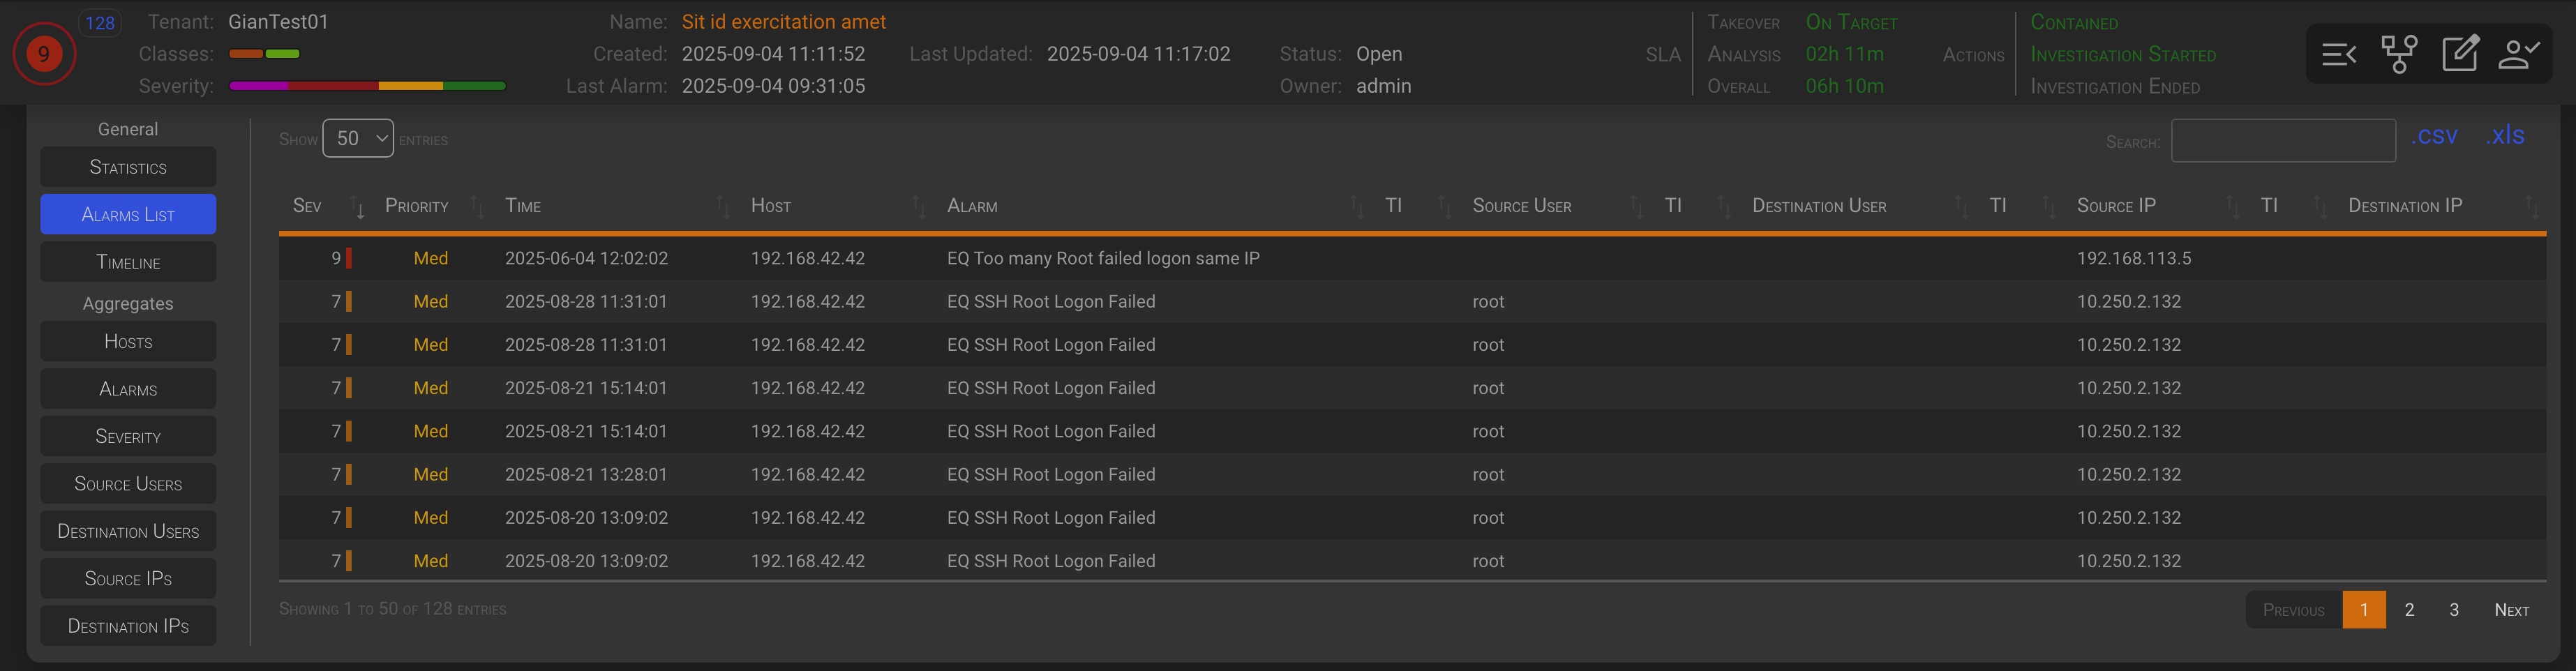
2.2.1.2 Alarms List
In the Alarm List tab you will see the list of all the alarms within the triage.
2.2.1.2.1 Incident Alarm management
Clicking on any row in the Alarms List tab of the Incident Analysis panel will open the Alarm Management panel for the selected alarm.
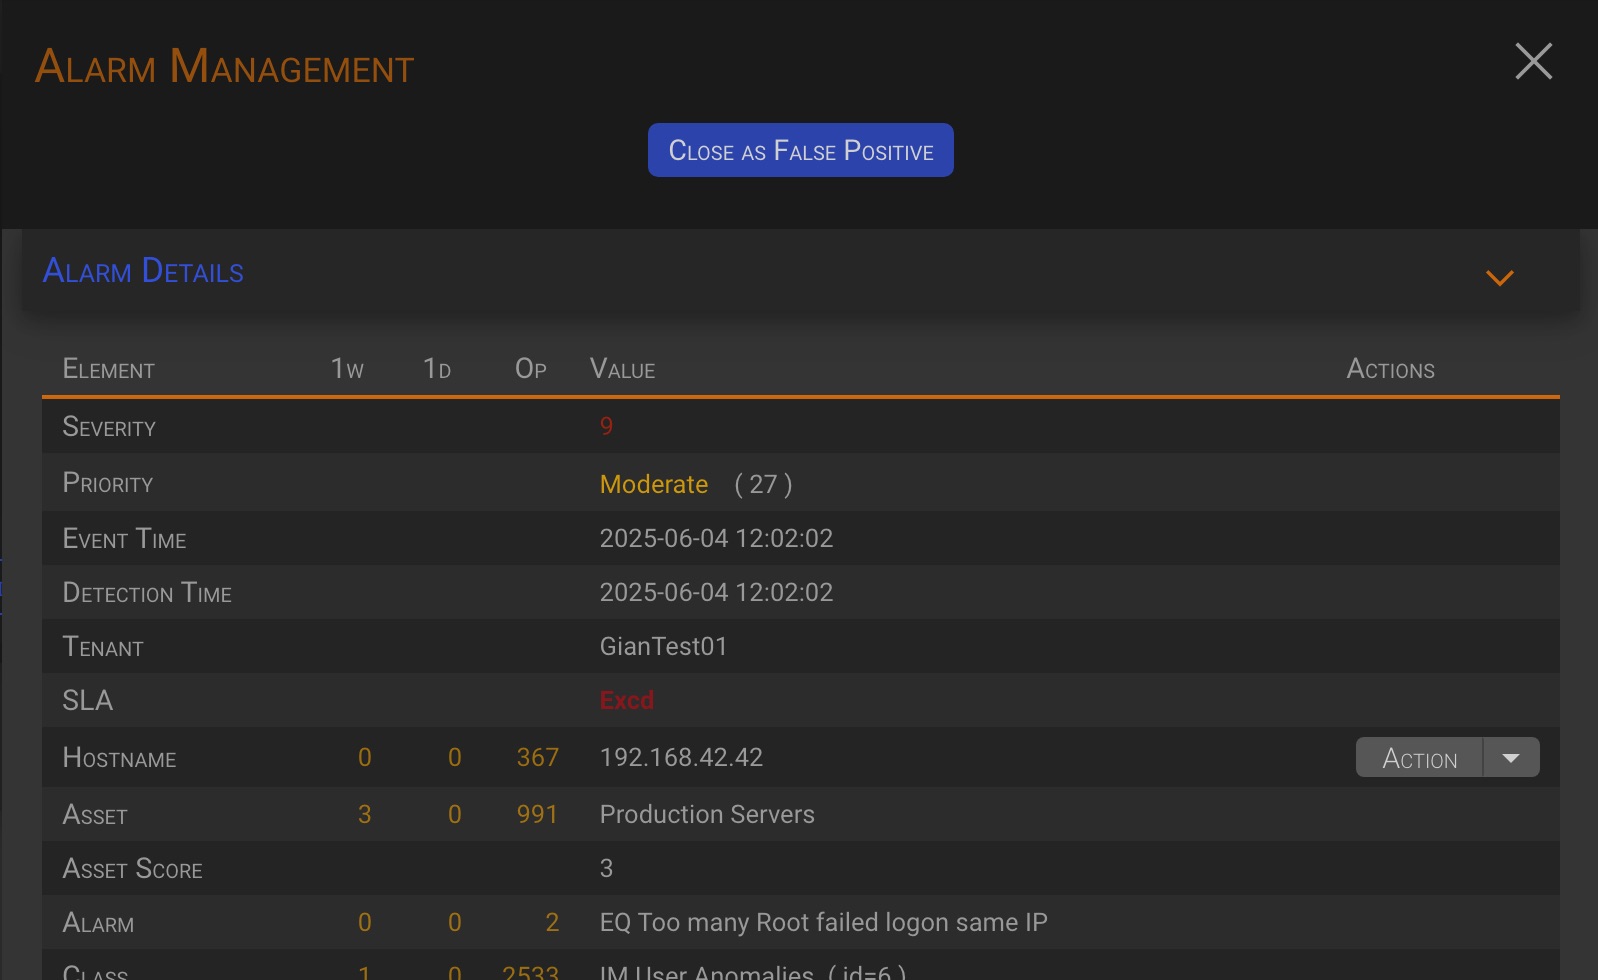
As you can see, the Alarm Management section differs from the one on the Alarm/Triage Dashboard. This is because Alarm Management Actions change depending on the context.
Let’s go deep in this actions.
TIP
Please see the 03 - Alarm Details and Operation for more details on the alarm detail section.
2.2.1.2.1.1 Close as False Positive
By clicking the Close as False Positive button, an hidden section will appear below the management actions button.
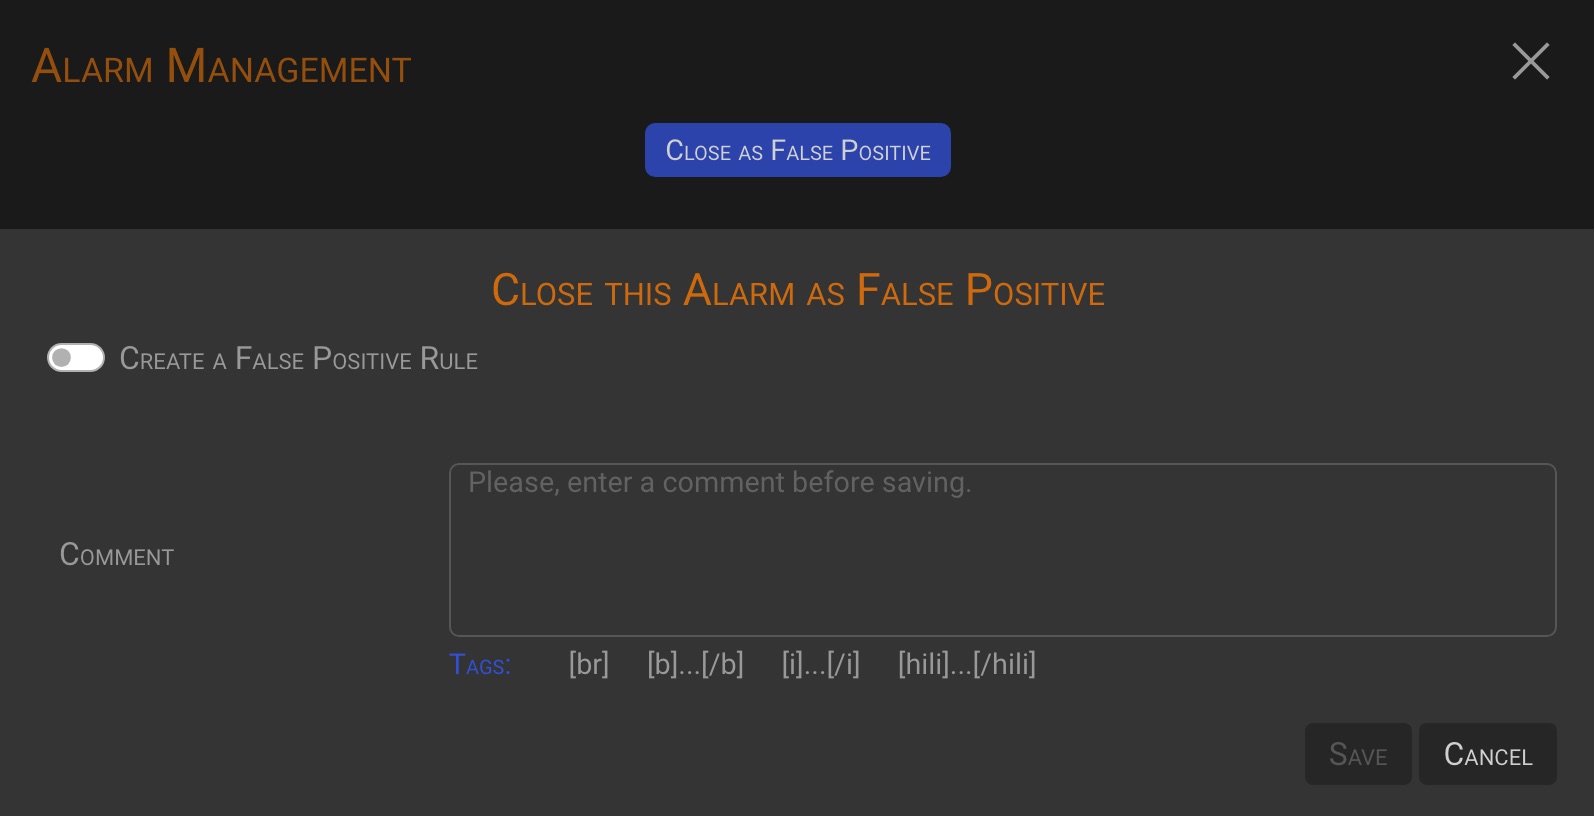
After entering a Comment, the Save button will be enabled, allowing you to close the alarm as a false positive.
2.2.1.2.1.2 Create a False Positive Rule
Activating the Create a False Positive Rule switch a new hidden section will appear enabling you to define a false positive rule.
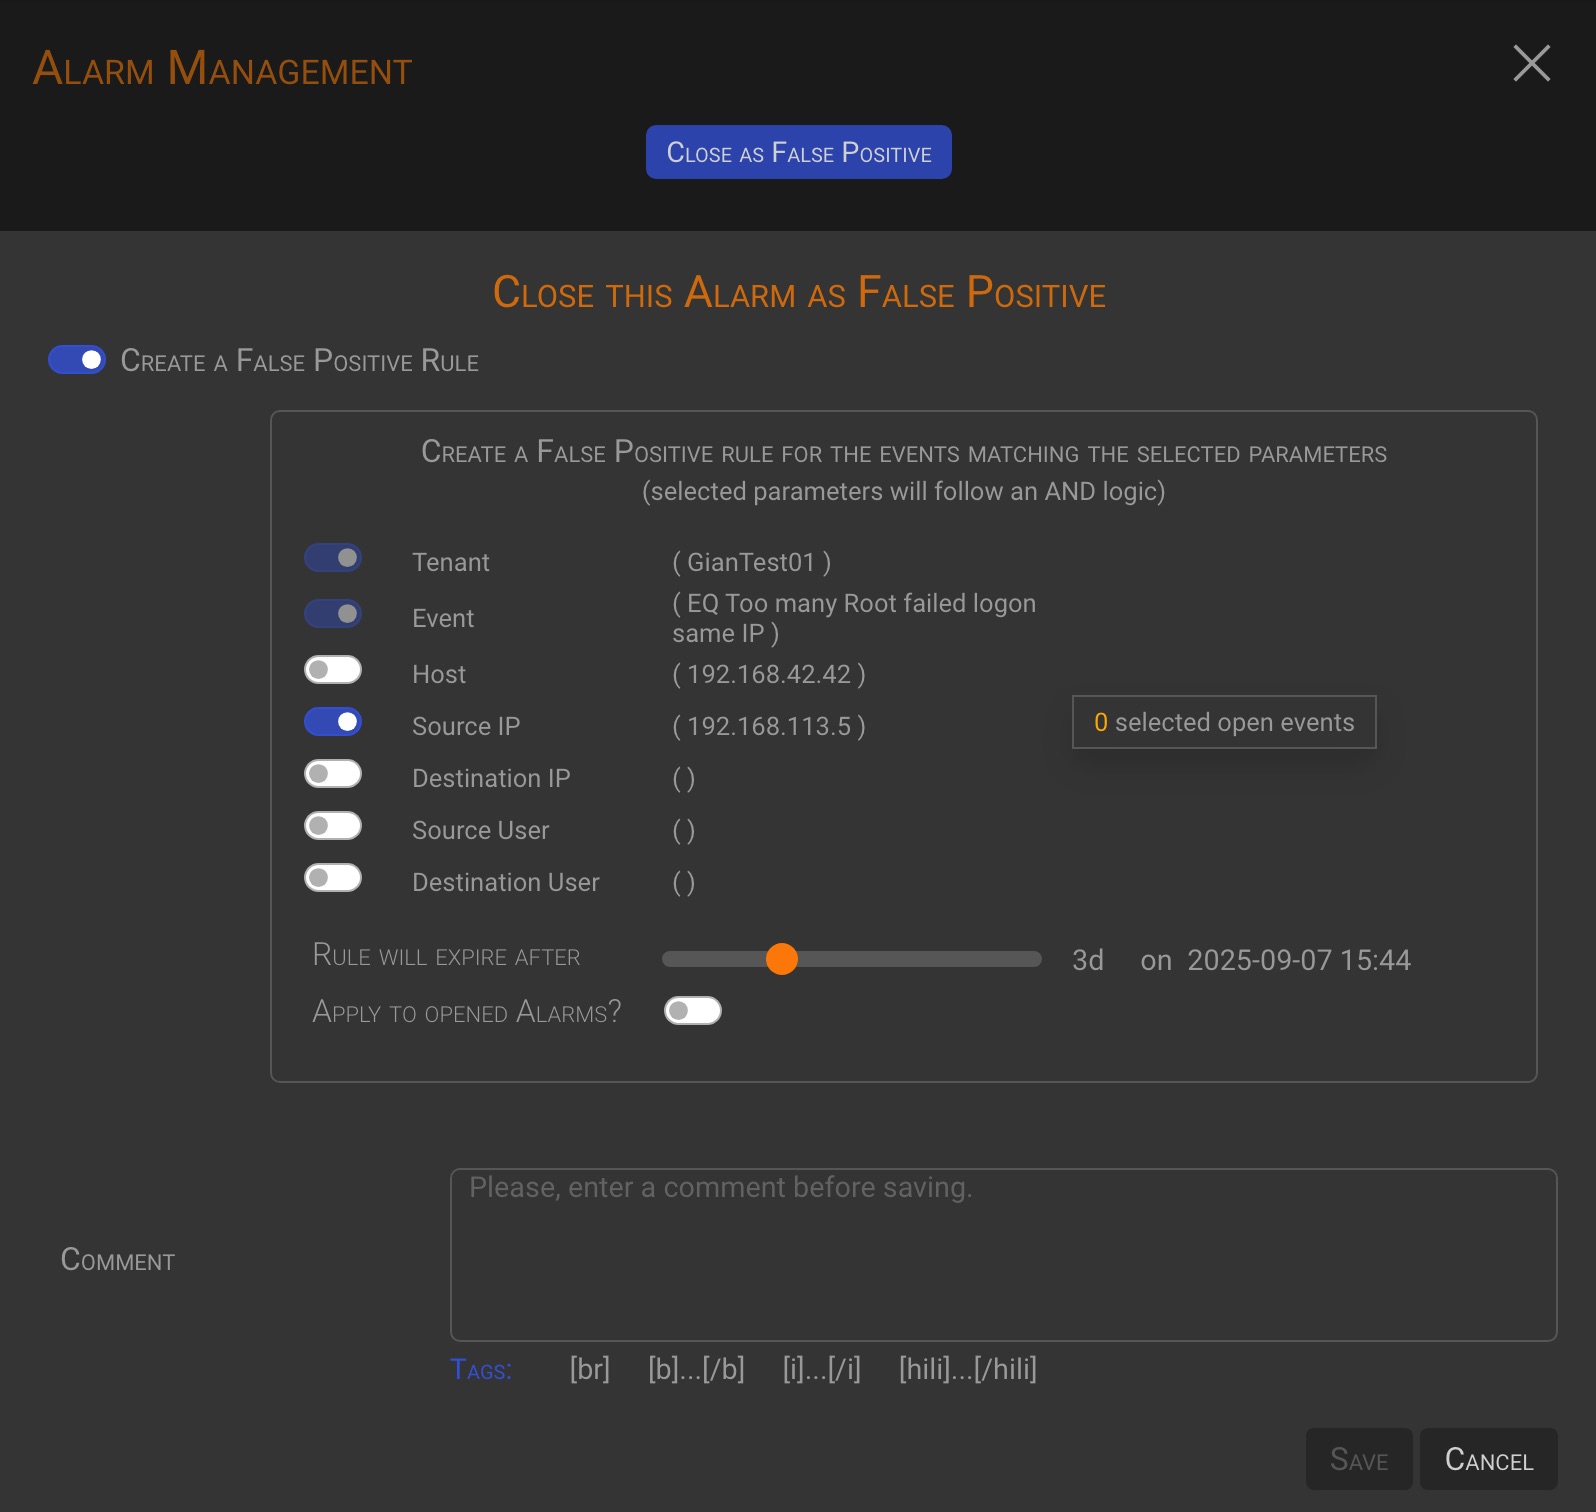
How to create a rule
-
First, select the parameters to be used in building the rule. In the example, the source IP address and source user name were selected. The tenant and event name are selected by default. Note that as you select parameters, the system will update the number of open events that match your current criteria (+).
-
After selecting the parameters, you may want to set an expiration date for the rule. Use the Rule will expire after slider to set the expiration date. The backend will drop the rule when the expiration date will is met.
-
You can also choose to apply the current rule to the alarms that are currently open, turning on the Apply to opened Alarms? switch. The number of affected events is displayed in the rule box. (+).
-
Enter a comment and click the Save button to save the rule and close the current alarm as a false positive
TIP
The backend will apply false positive rules to all incoming alarms. Those matching a rule will be automatically closed as a false positive.
Important!
False positive rules can only be defined at the alarm level when the Alarm Management Panel is accessed by clicking on an alarm row in the Alarm List tab of either the Triages or Incidents page.
NOTE
Please refer to the 05 - False Positive Rule management chapter for more information on rules management.
2.2.1.3 Timeline

In the Timeline tab you will find the incident timeline. A chronological list of all management action taken against the incident by the users and the backend functions.
2.2.2 Aggregates Tabs
The aggregates tabs look similar, so only one will be documented as an example.
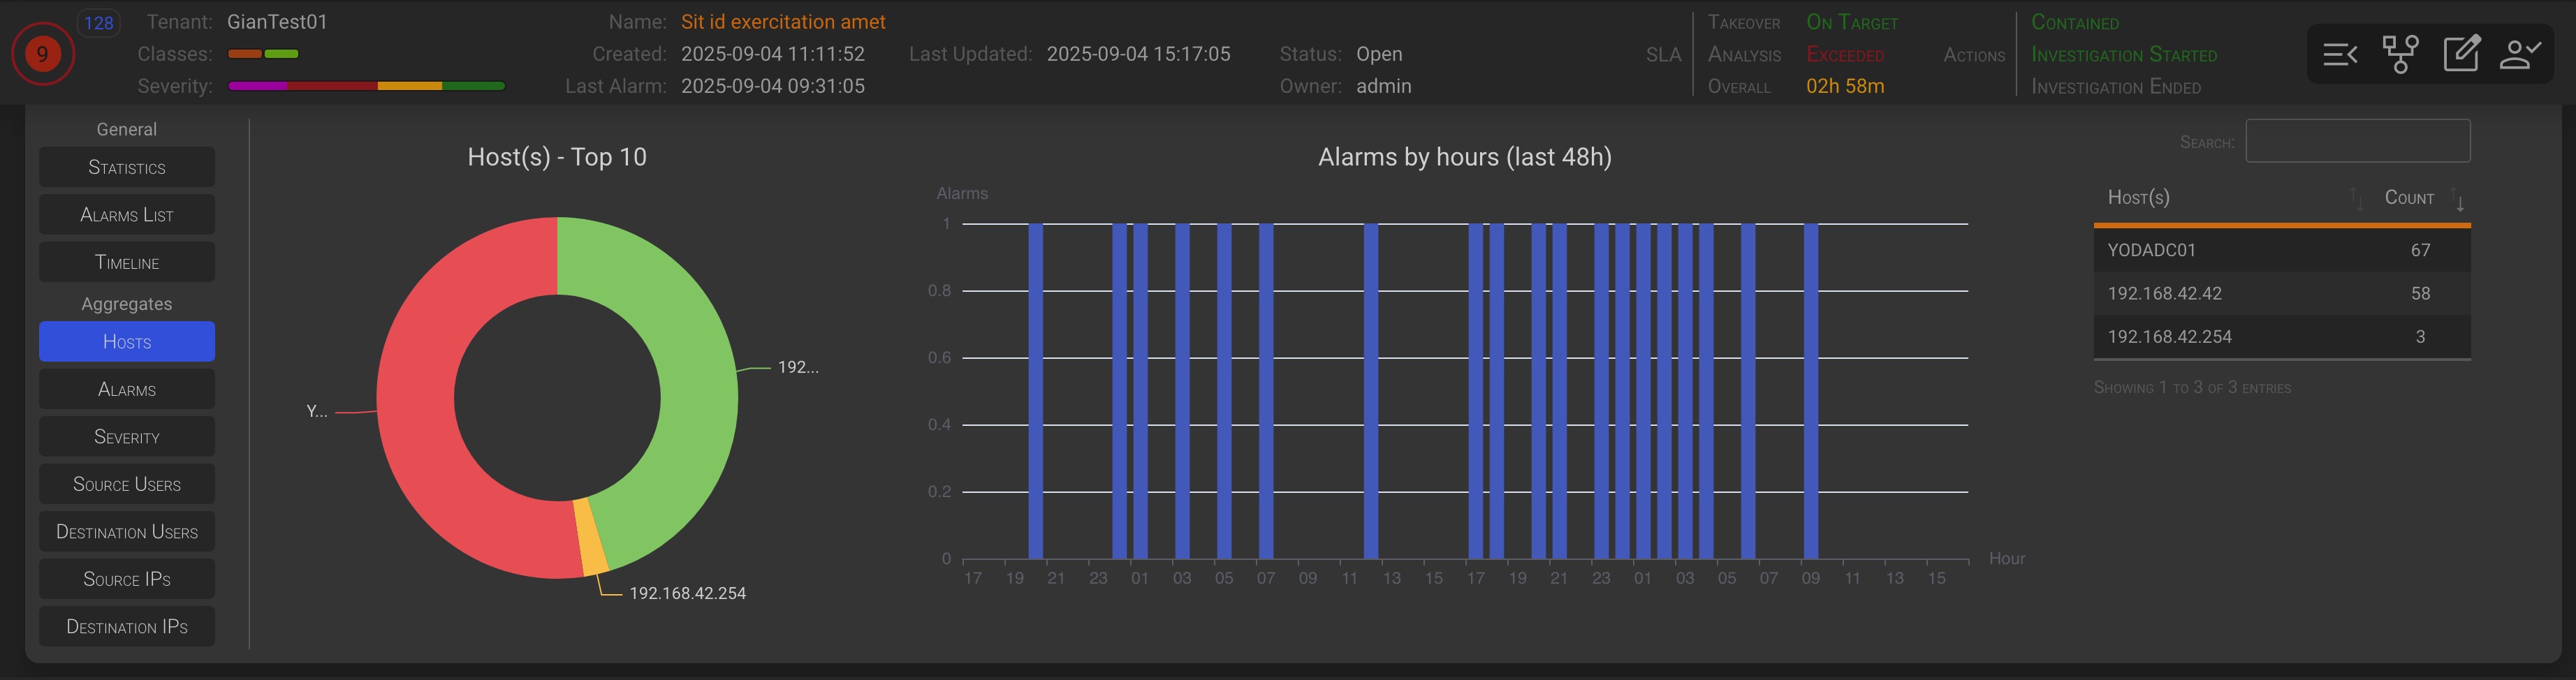
In each Aggregate tab you will see:
- A top 10 doughnut chart of the aggregate parameter
- The last 48 hours alarms hits bar chart of the aggregate parameter
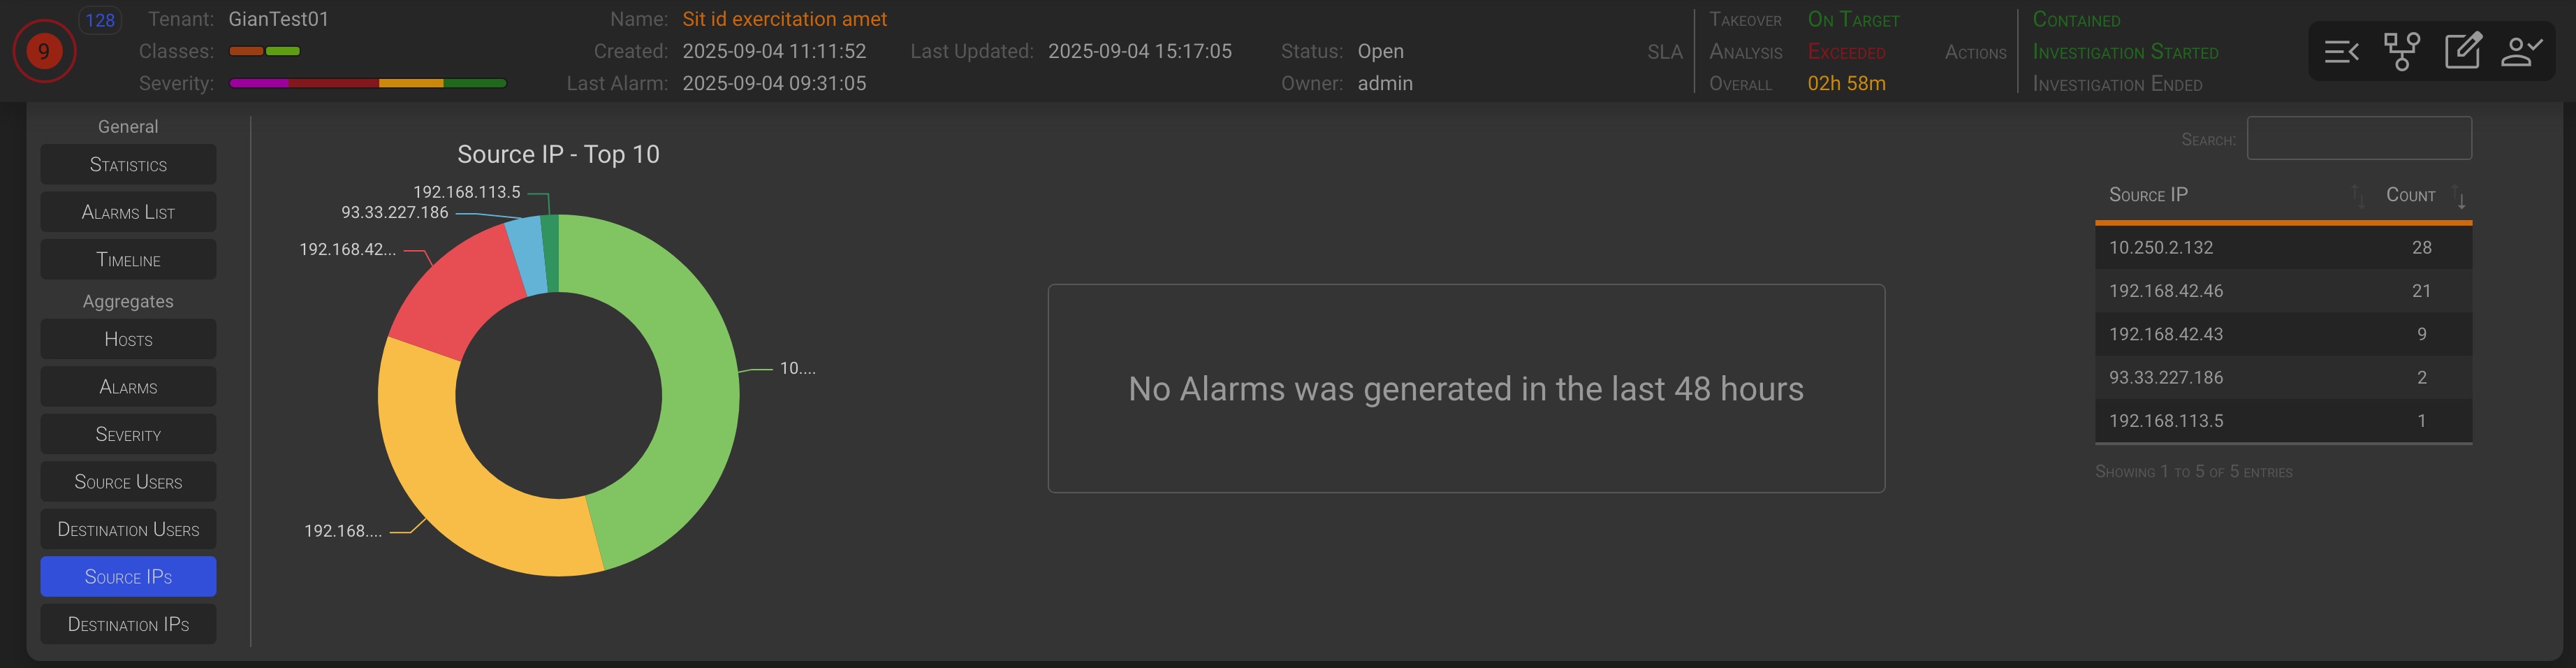
- The aggregate parameter table
If there have been no alarms for the aggregate parameters in the last 48 hours, you will see the text No Alarms was generated in the last 48 hours instead of the chart.
2.3 Incident Chart
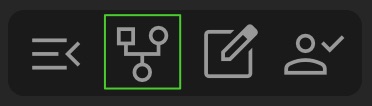
Clicking the Open Chart button allows you to view the incident through a chart, which helps you identify the involved elements more easily.
2.3.1 Type Force chart
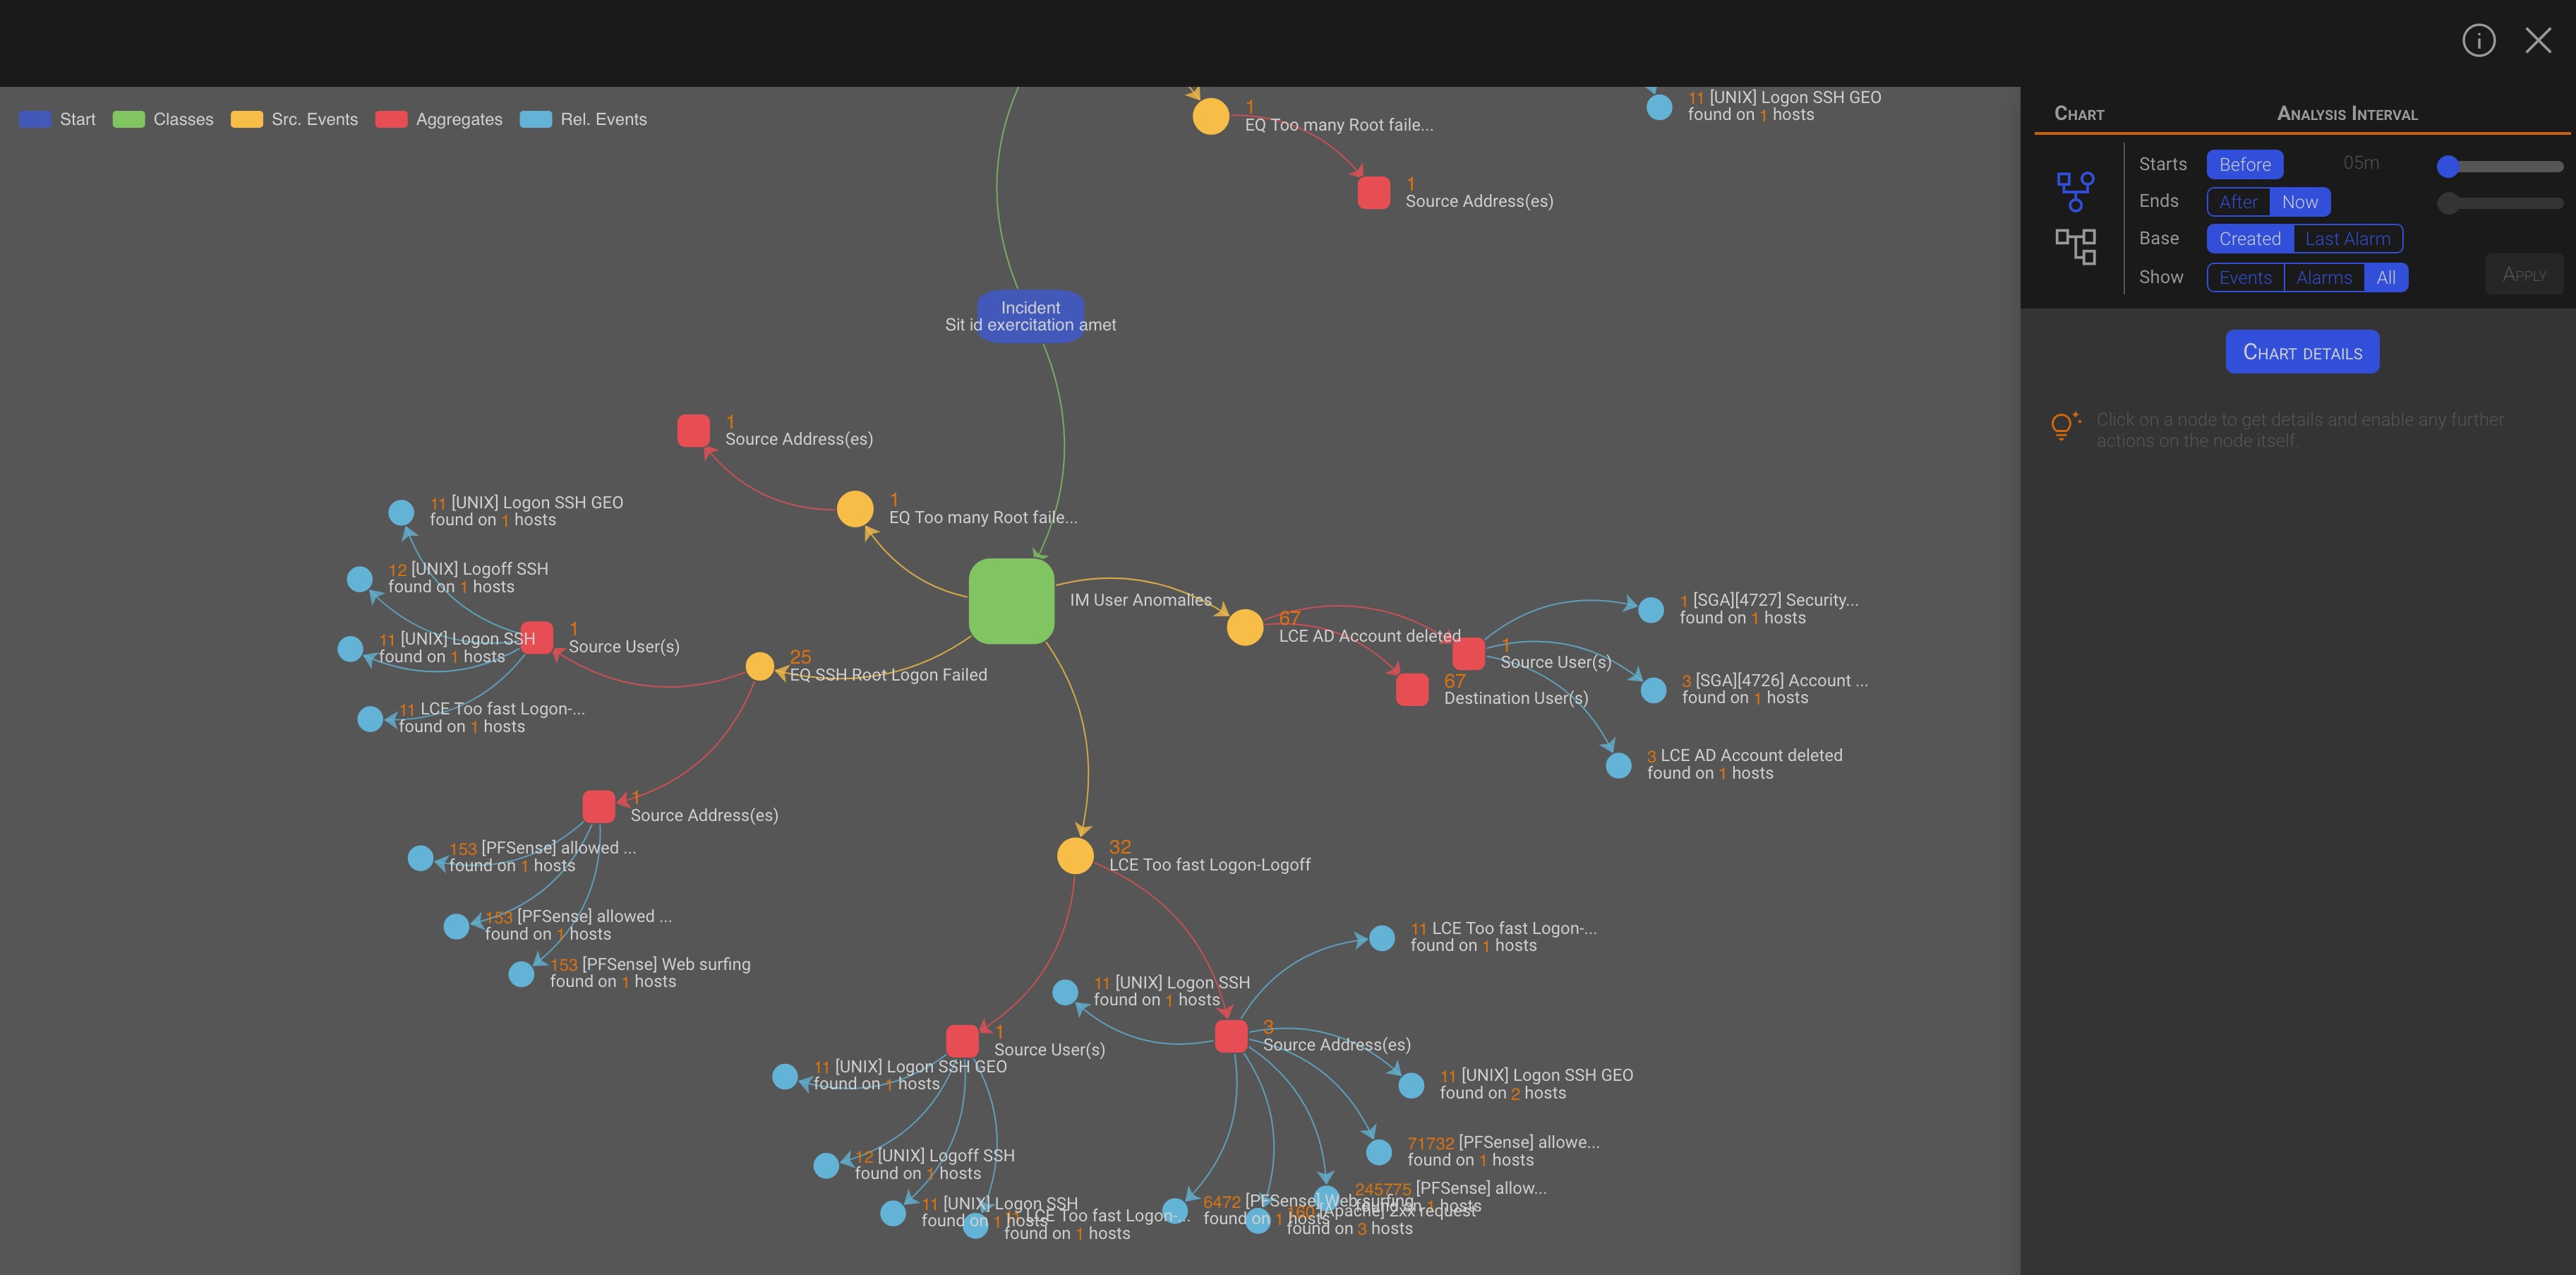
By looking at the legend in the upper left corner, we can identify the chart objects as follows:
- Start: Is the starting point, represent the Incident.
- Classes: There is a direct connection to the incident for each of the classes involved.
- Source Events: Each Class is split by his alarm events.
- Aggregates: Each alarm event is aggregated and split by its KPIs.
- Related Events: For each aggregate, the entire SGBox events database is searched for other events and alarms that occurred before and after the incident creation time and that have the same KPI.
TIP
- Object Size: Since the weight of the incident is 100, the size of each object will be proportional to its percentage of the total weight.
- Threat Intelligence: Objects whose KPIs match one or more threat intelligence lists will be surrounded by a magenta border and will display the TI icon in their legend.
2.3.2 Type Tree chart
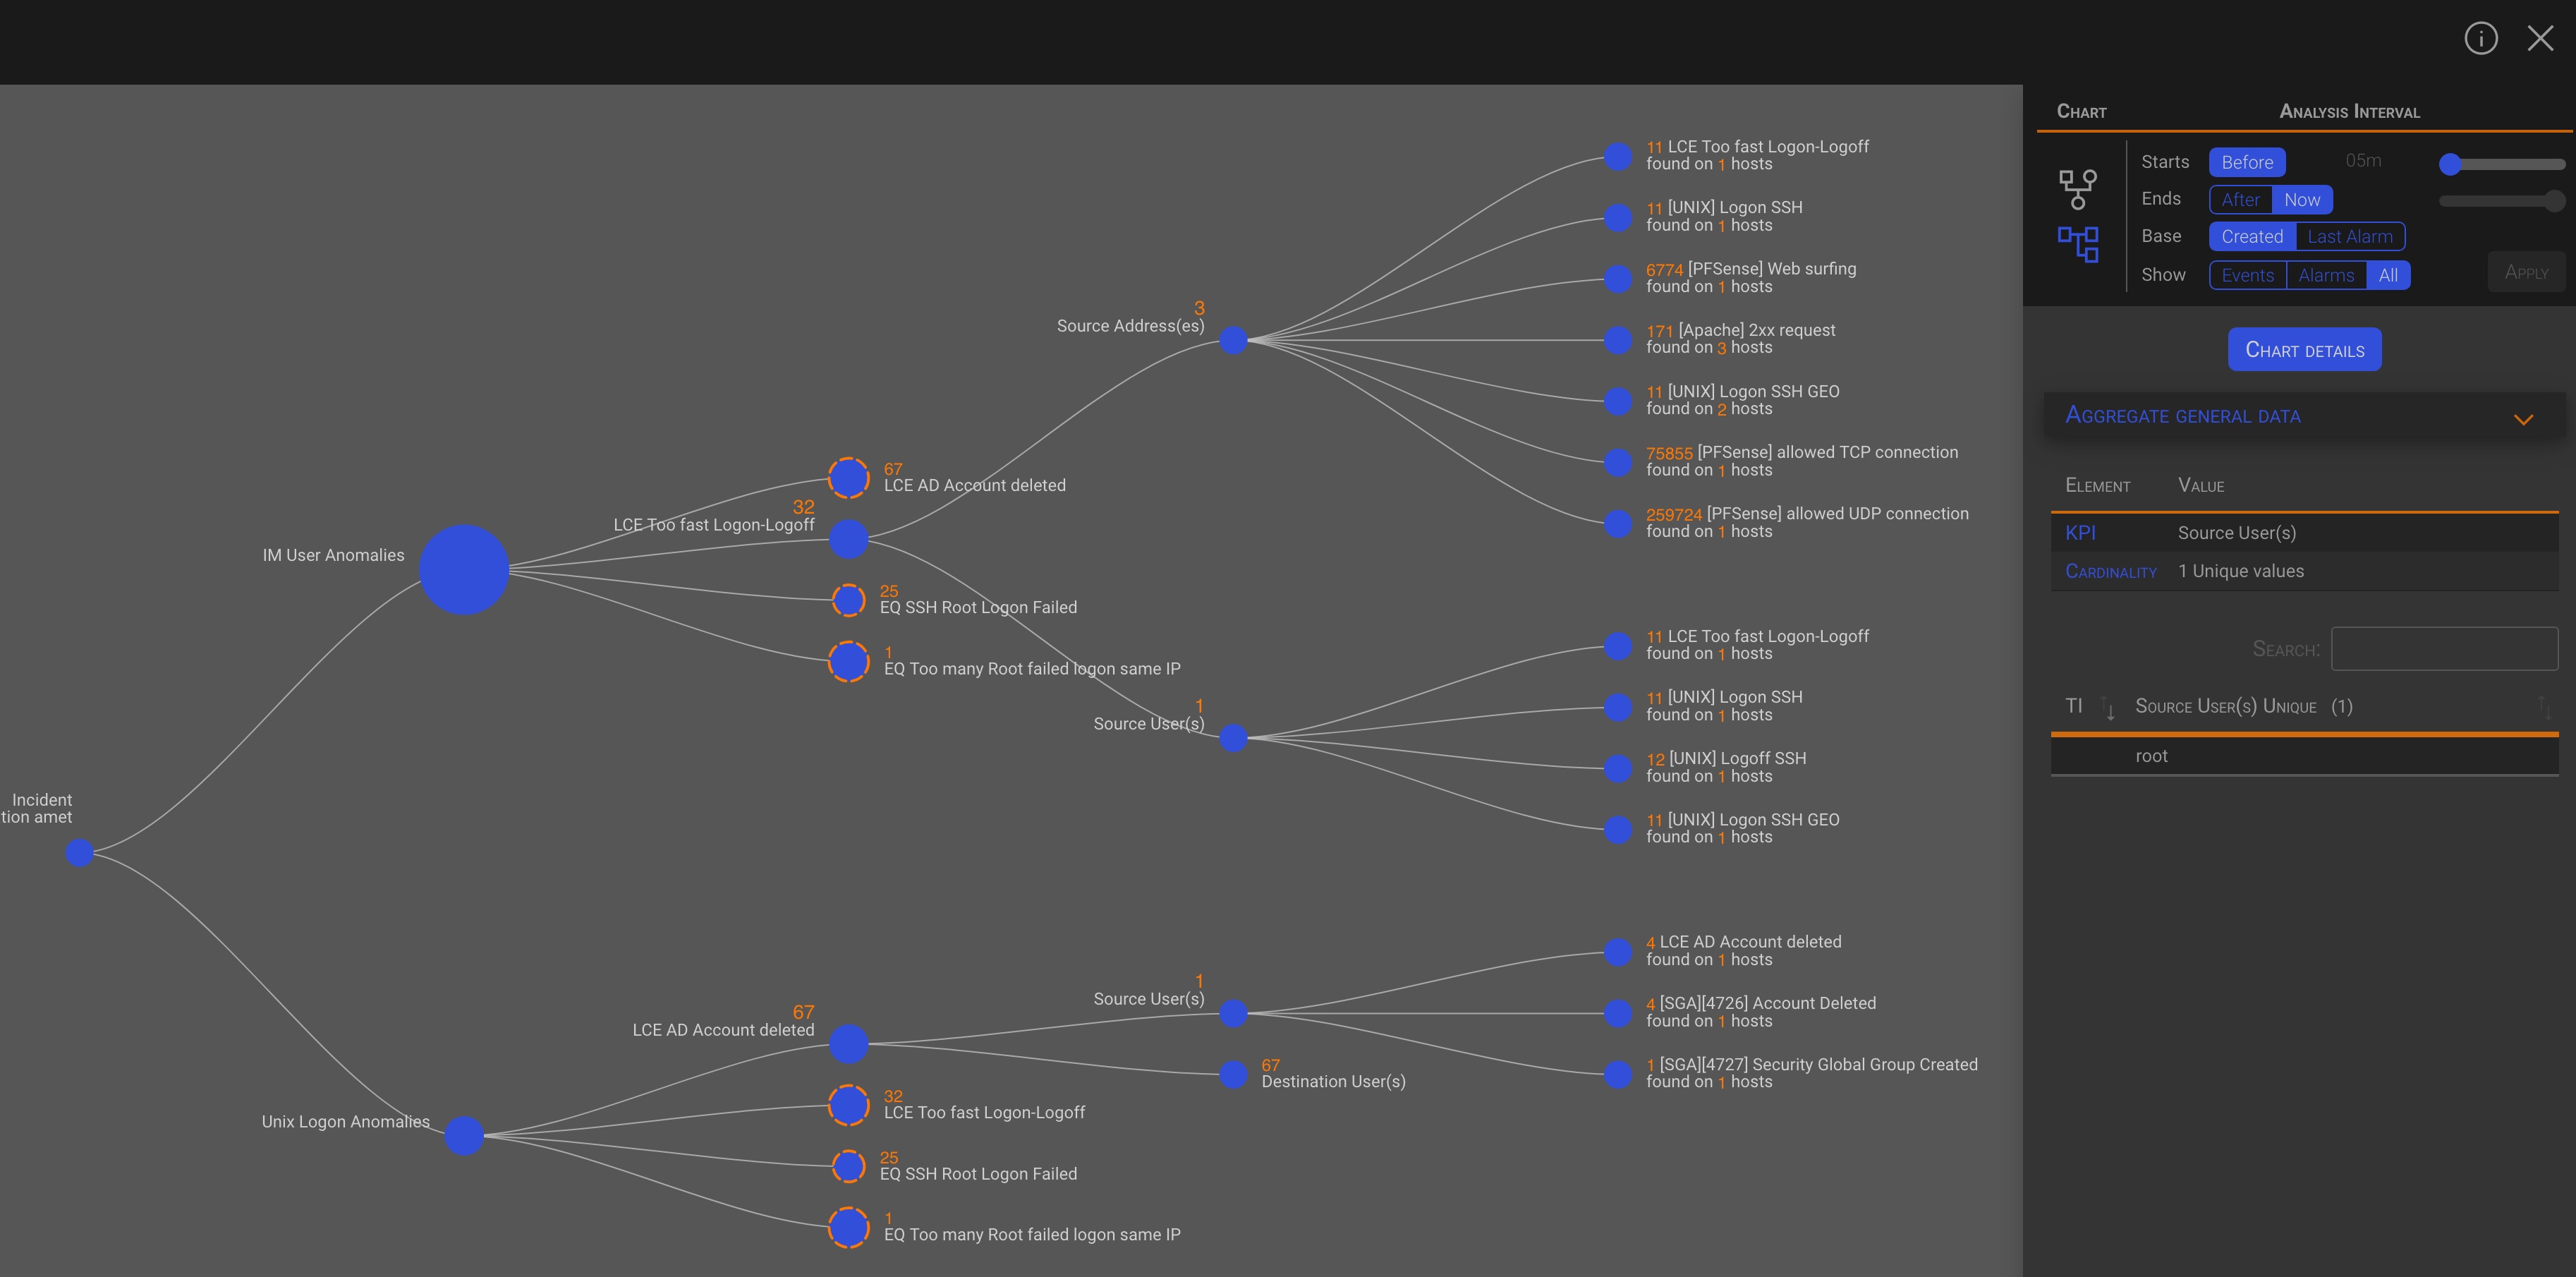
In the type Tree chart there are the same objects, as in the type Force chart, left to right ordered. So the first object is the Start, followed by all other objects in their order Classes, Source Events, Aggregates and Related Events.
TIP
If an object has a dotted orange border, it means that the object contains other objects. Clicking on one of these objects will display its contents.
Info
The rules for sizing and threat intelligence match are the same as for the type Force chart.
2.3.3 The chart Options
You can modify the chart content and behavior through the Chart Options. The Chart Options area is split vertically into the Chart and Analysis Interval sections.

2.3.3.1 Chart
In the Chart section, you can choose to view the Force or Tree chart type by clicking on the chart icons. Both charts contains the same information, just presented in a different way.
2.3.3.2 Analisys Interval
The following options are available:
- Starts: Adjust the cursor to specify how far back in time you want to start collecting related events before the incident was created.
- Ends:
- After Allows you to set how long after the incident was created the collection of related events should end.
- Now This will collect all related events that have been generated from the Starts time until now.
- Base: Select Created or Last Alarm to set the analysis start time. This will set the Starts and Ends values accordingly.
- Show: Selects the type of the Related Events that will be shown in the chart.
Click the Apply button to draw a new chart based on the specified options.
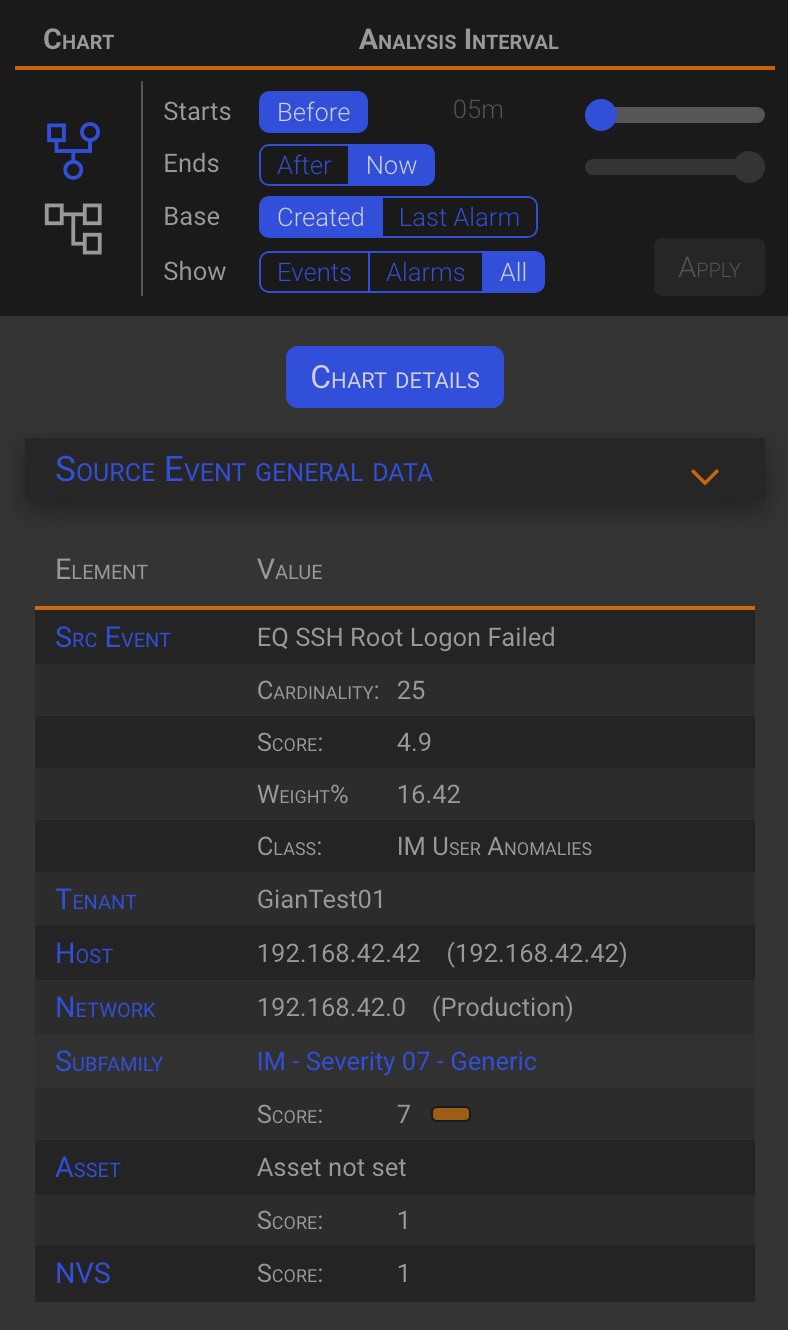
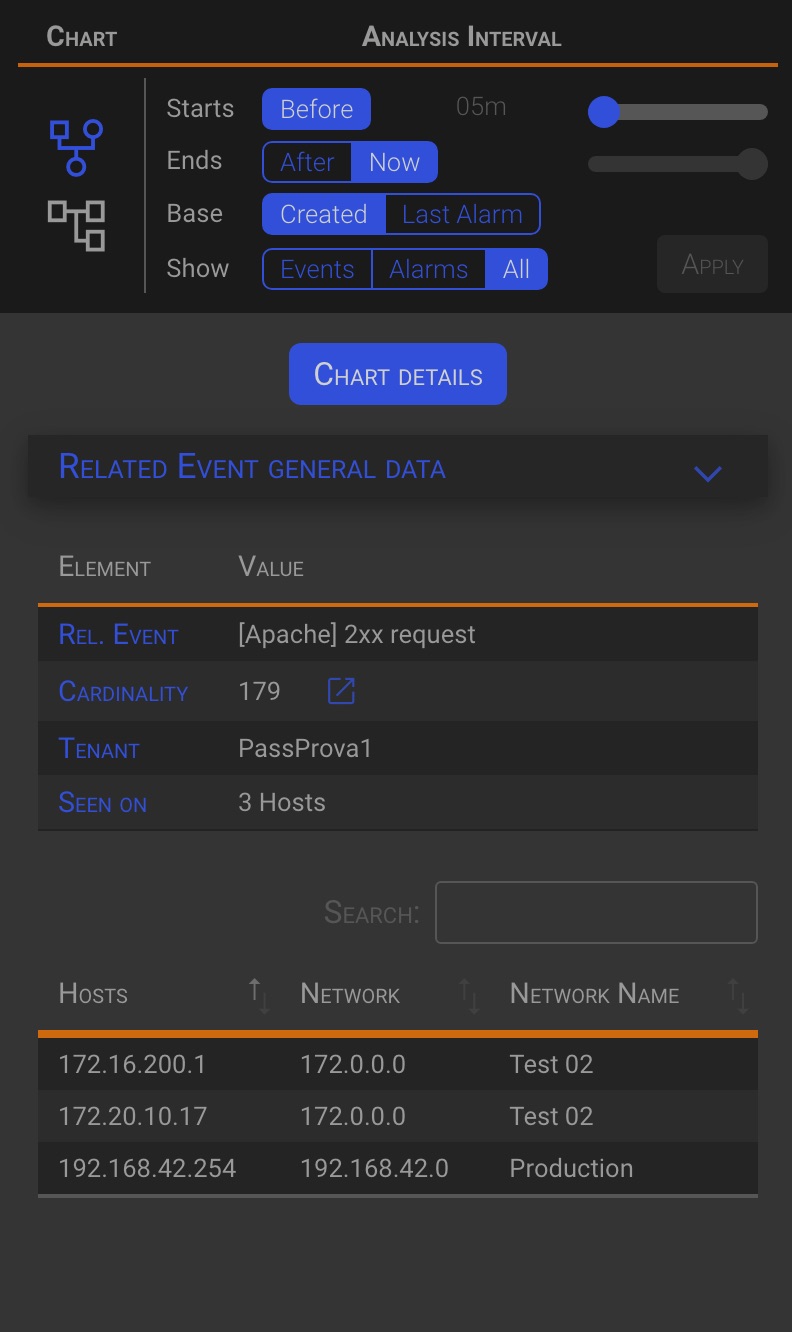
2.3.4 Chart Details
Regardless of the type of graph, clicking on various objects shows details about the selected object in the context area on the right. Below are some examples:
2.4 Management
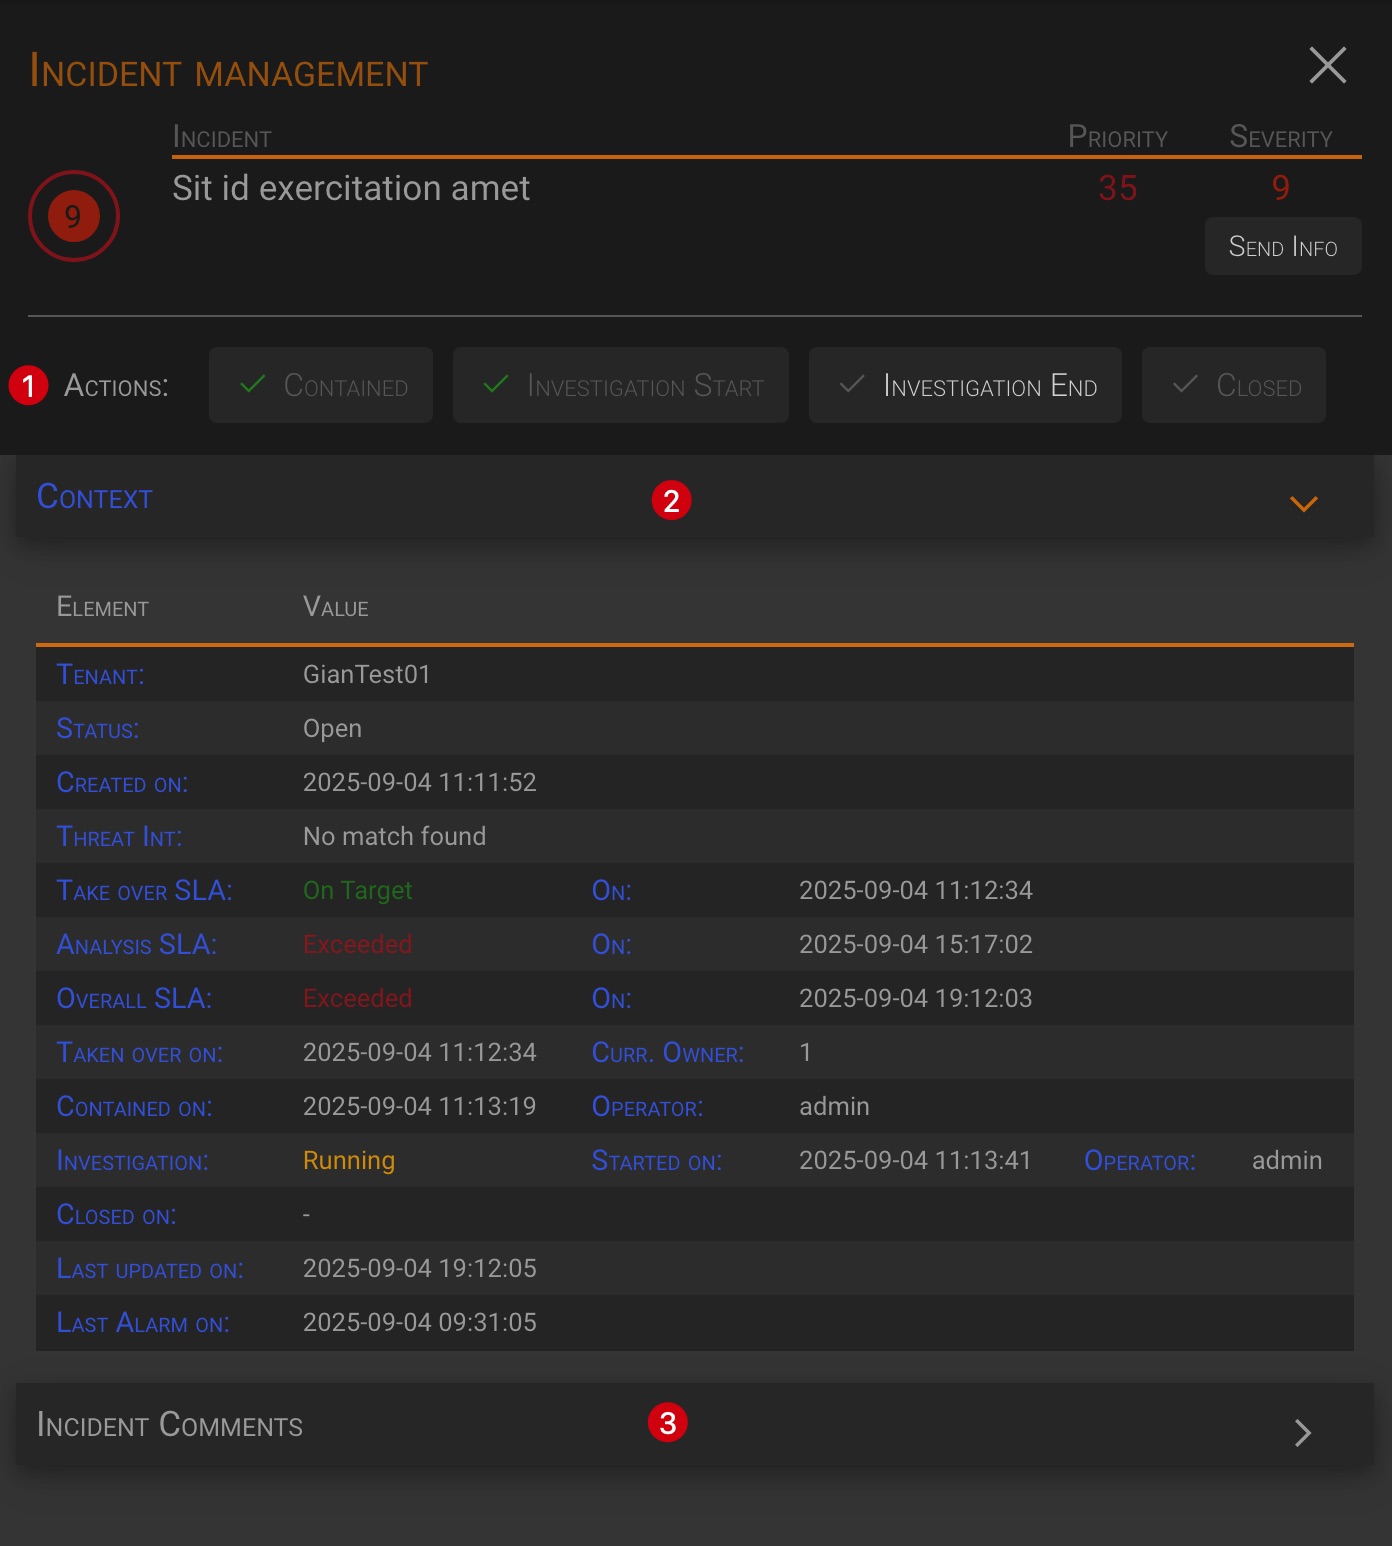
Clicking on the Manage button will open the Incident Management panel. By default, the panel will open with the Context section displayed.
The Alarm Management panel consist of following three sections:
- Incident Management
- Incident Context
- Incident Comments
Let’s see each section in detail.
2.4.1 Incident Management
This section allows you to manage the progress of the incident management flow.
The incident lifecycle consists of three main phases: containment, investigation and remediation. The action buttons allow you to confirm completion of these steps. The action completion date and time will also be used in the SLA timing definition.
There are four buttons to indicate the completion of each phase:
- Contained States the end of the of the containment actions.
- The analysis phase cannot start until containment actions are completed.
- Investigation Start States the start of the analysis phase.
- Investigation End States the completion of the analysis phase.
- The date and time of this phase is used to define the incident Analysis SLA.
- Closed States the completion of the remediation phase and of all the actions that were taken to remediate the incident.
- The date and time of this phase is used to define the incident Overall SLA.
The action buttons drive the incident progression sequence. In a newly created incident, the only available button is Contained.

The other buttons will become available one by one as each previous action is completed.

2.4.1.1 Contained
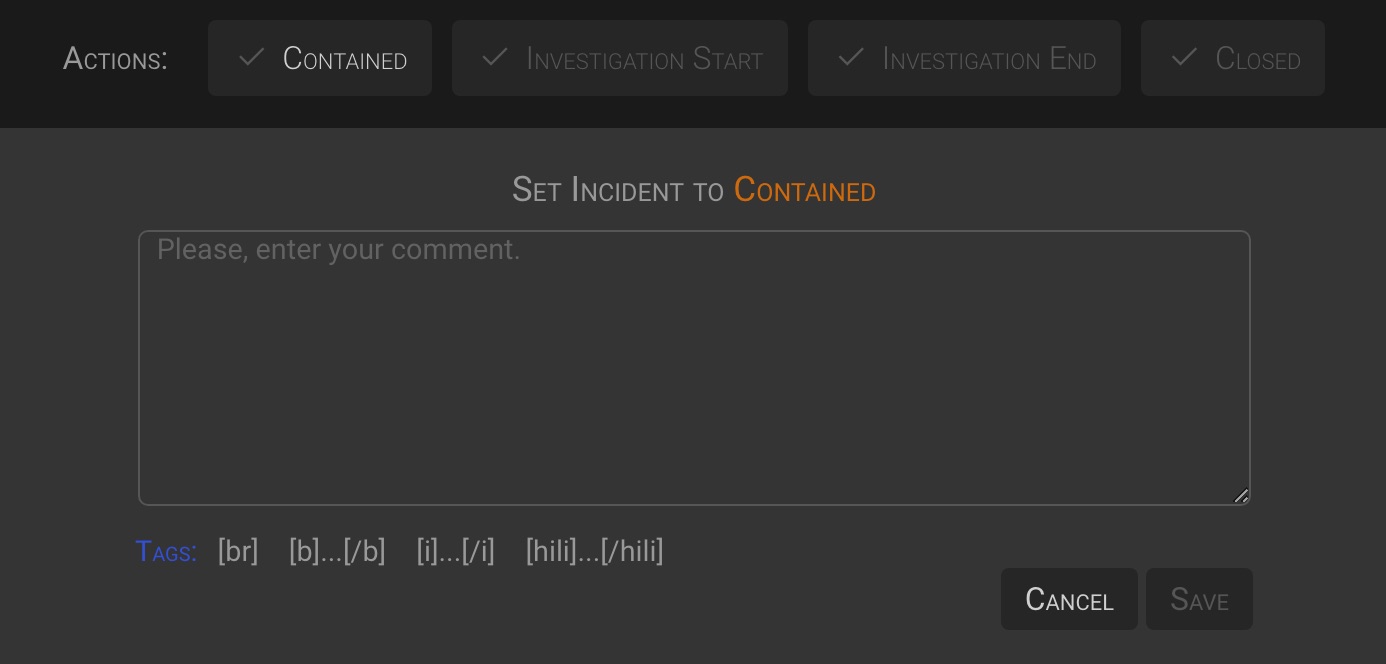
Enter a Comment and click the Save button to mark the incident as “Contained”.
2.4.1.2 Investigation Start
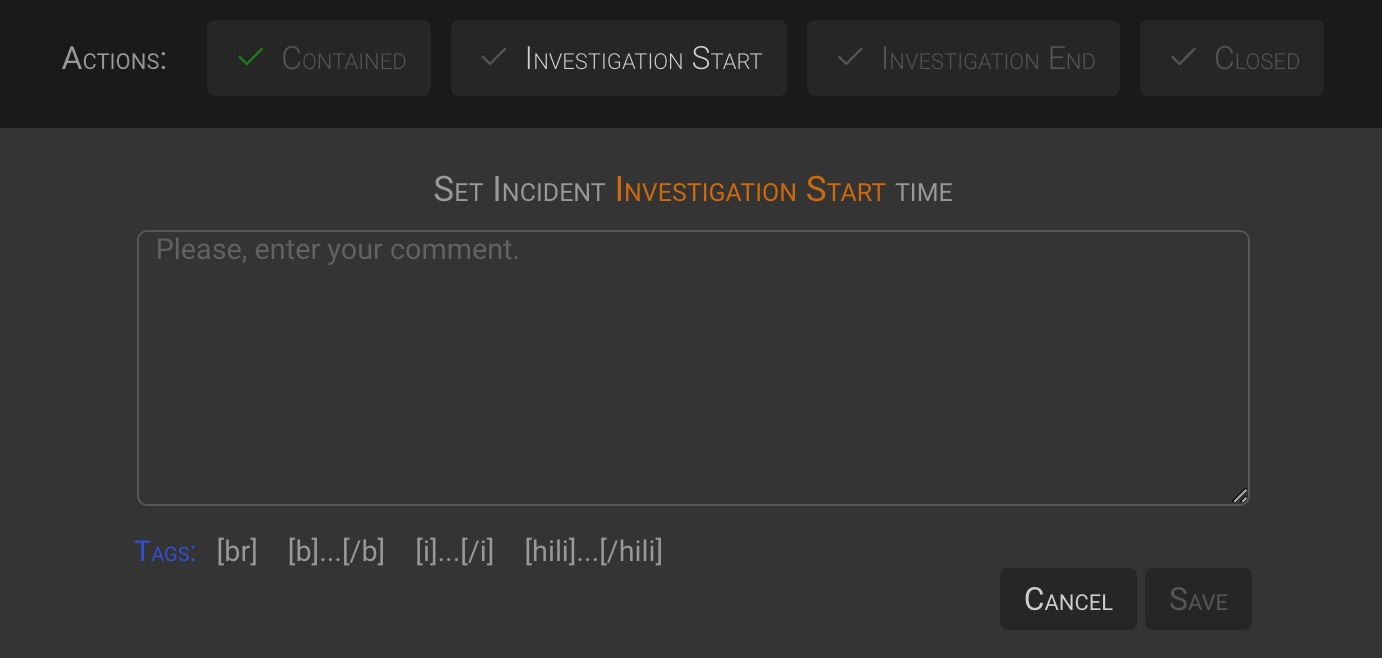
Enter a Comment and click the Save button to set the incident Analysis start date and time.
2.4.1.3 Investigation End
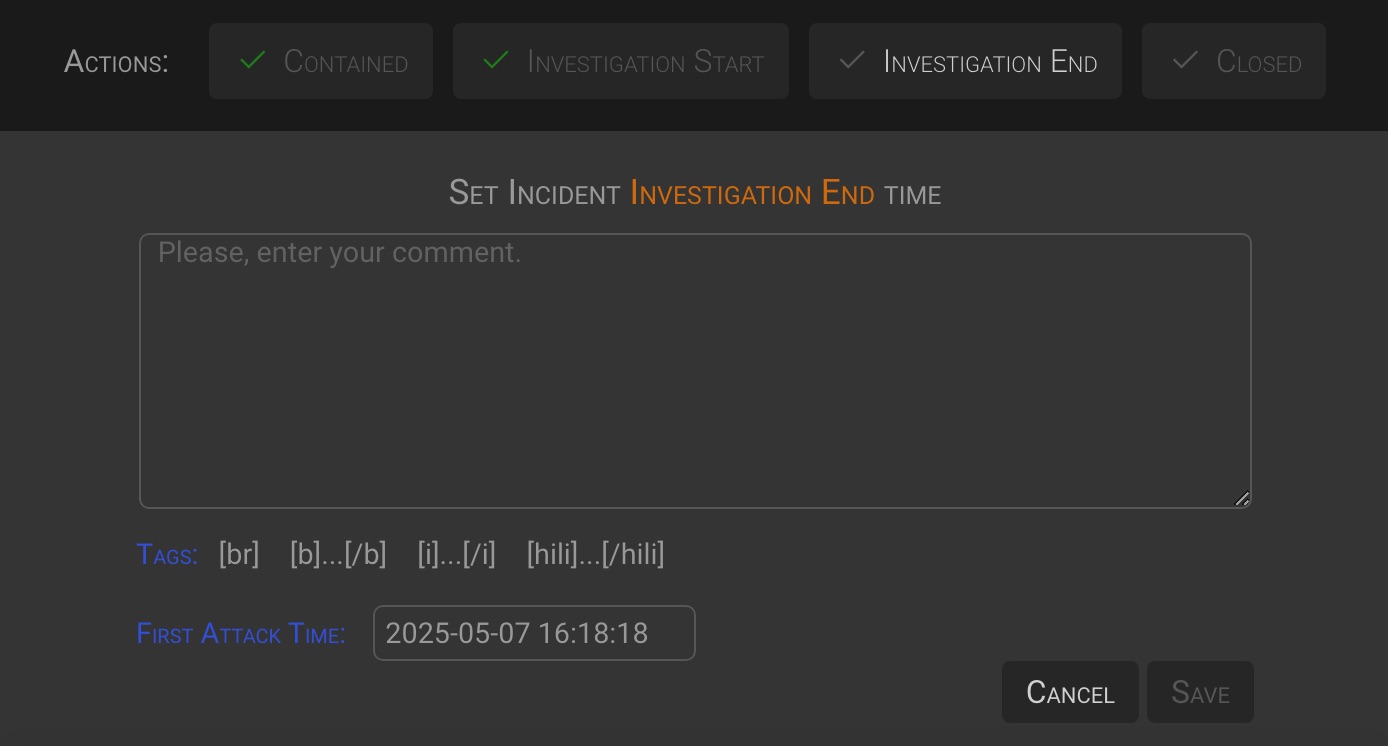
Enter a Comment and the First attack Time date and time, then click the Save button to set the incident Analysis end date and time.
TIP
The First attack Time is determined by the analyst during the analysis. The system proposes the date and time of the first event within the first alarm of the incident, but you can change this value to the one your determine.
2.4.1.4 Closed
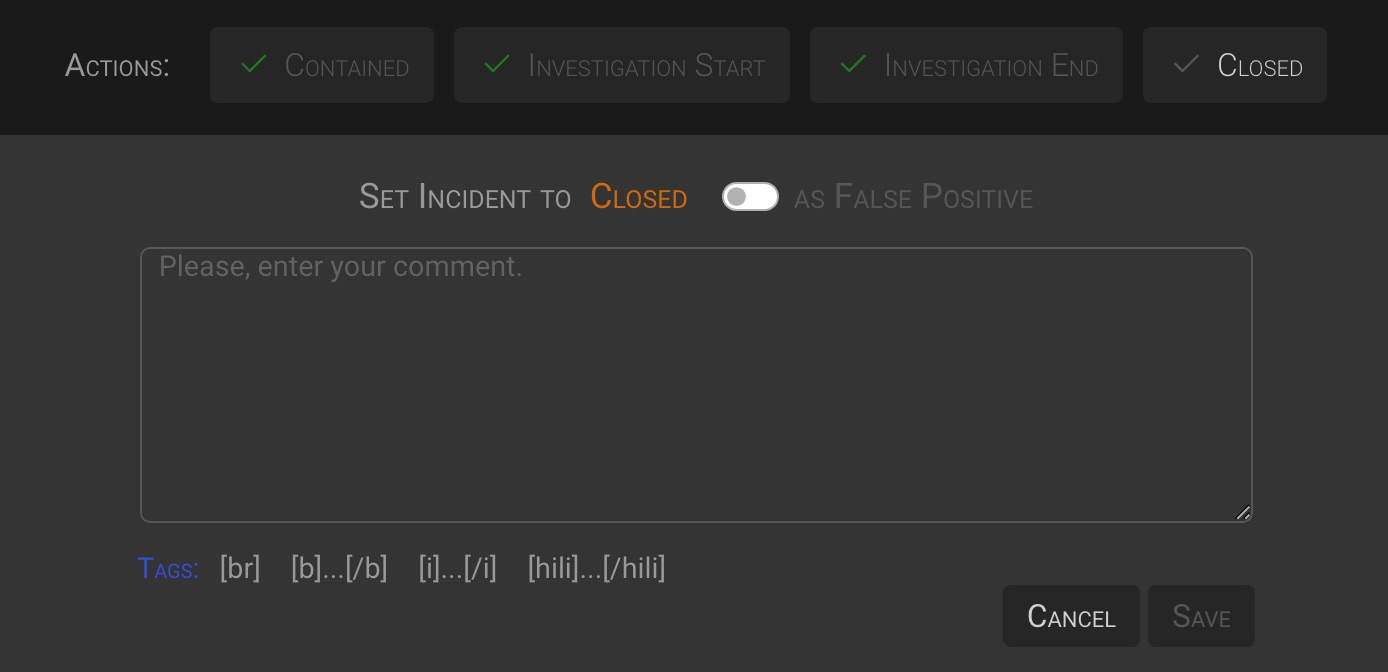
Enter a Comment and click the Save button to mark the incident as “Closed”.
Closed as False Positive
During the analysis phase the analyst can determine that the incident is a false positive, so it is possible to close the incident, and all of its alarms, as a false positive by turning on the as False Positive switch
2.4.2 Incident Context
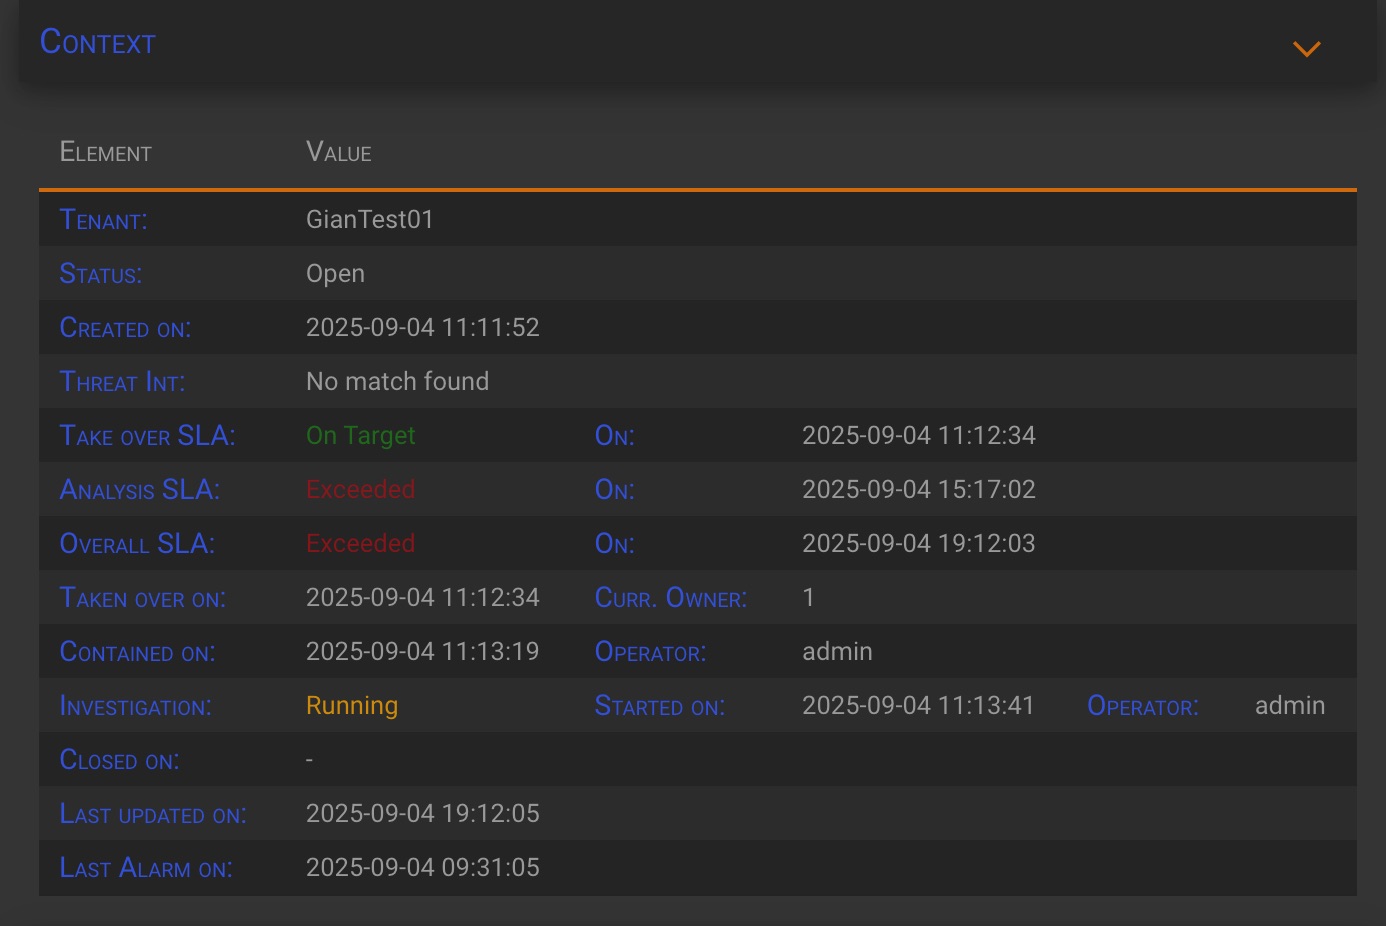
The Context tab provides a summary of relevant information about the incident.
2.4.3 Incident Comments
In the Incident Comments tab, you can view all comments and messages related to the incident, whether they were issued by users or the backend.

You can also add your own comments by turning on the Add new comment switch.
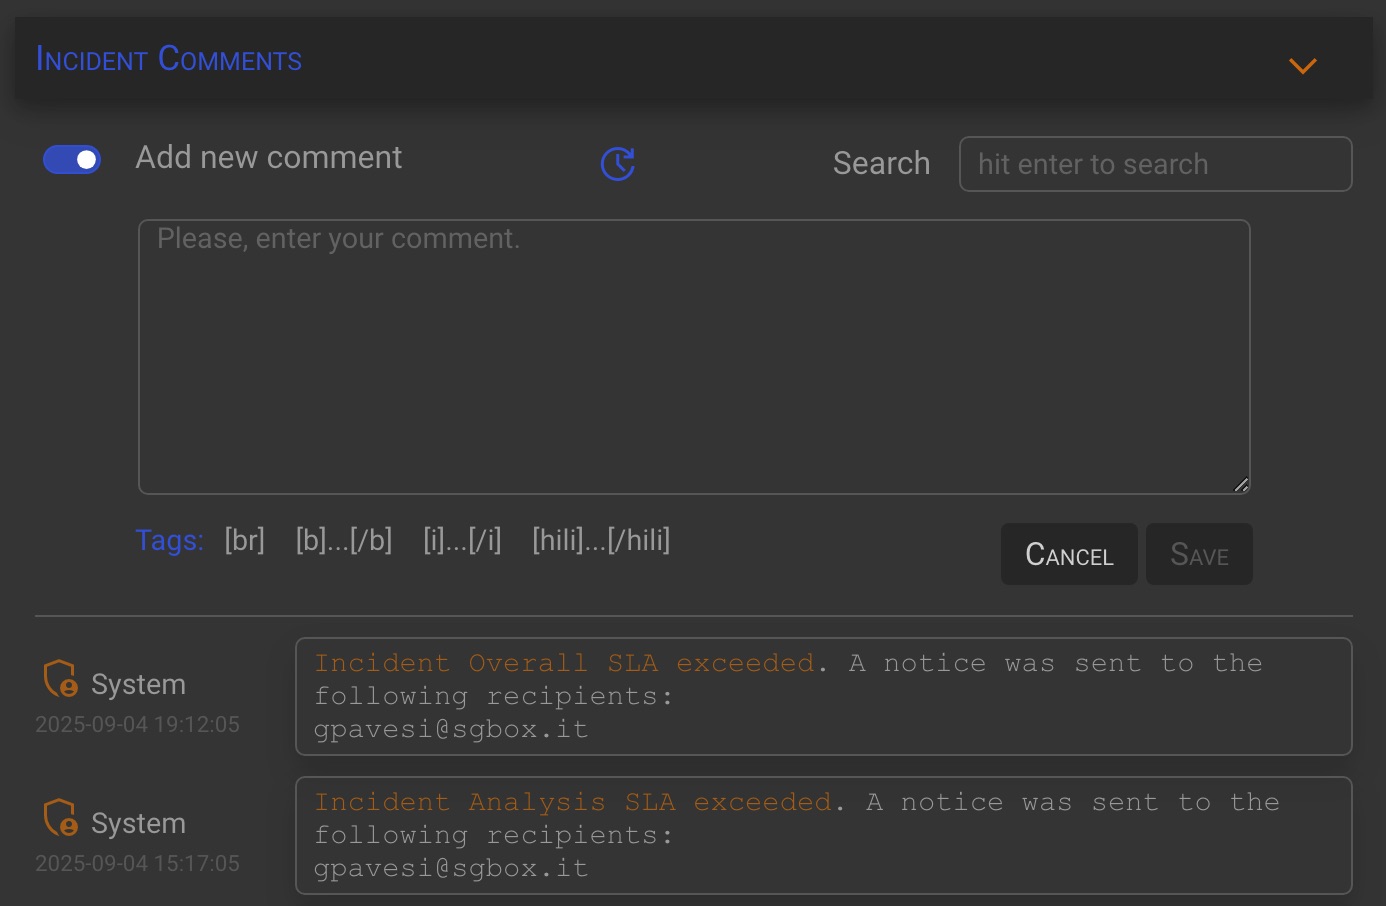
Enter your Comment and click the Save to save it.
TIP
The comment entered during the triage promotion to an incident is the first user comment in the incident comments section.