Once you have defined a false positive rule, it will be available for management in the False Positive Rules dashboard.
1 False Positive Rules dashboard overview
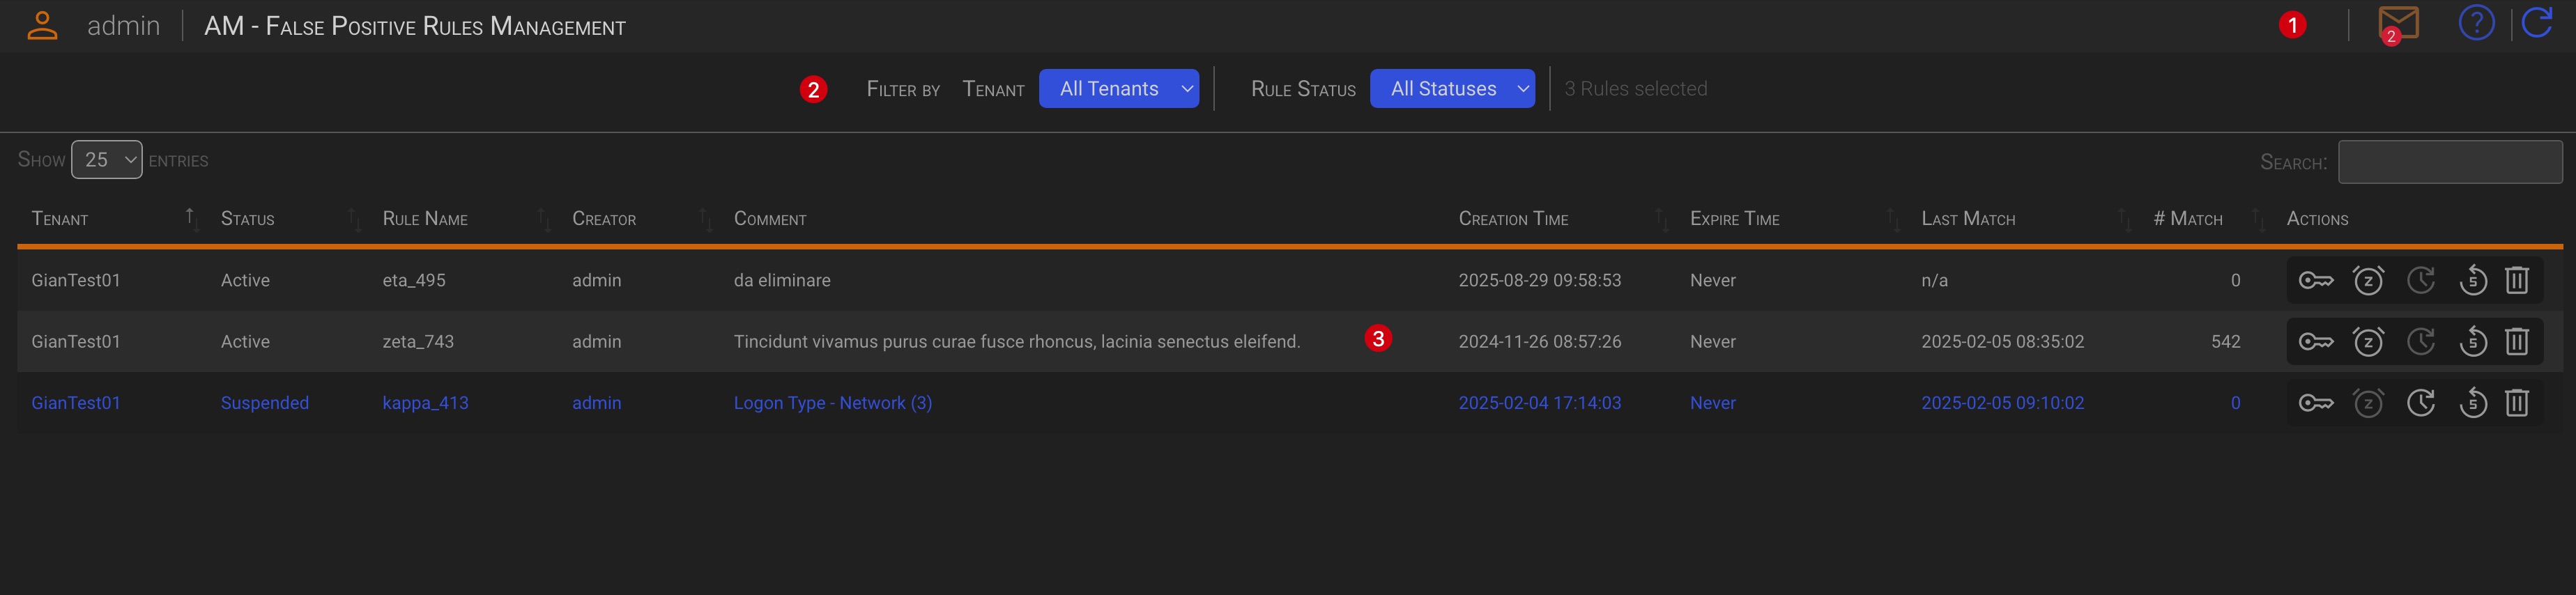
The False Positive Rules Dashboard is split into three main areas:
1.1 The Header section (1)
The only function available on the header is the messages handling.
- Messages By clicking the envelope icon, you can read messages sent to your account by backend processes, such as SLA expiration or other operational messages.
Tip
Click the envelope icon to toggle messages display.
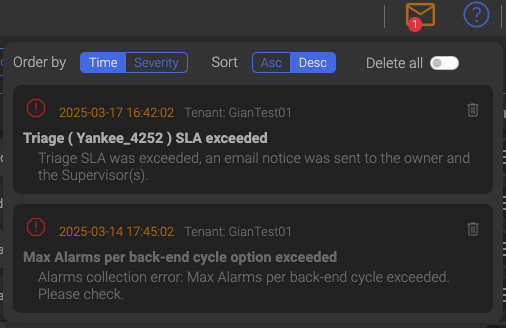
Messages actions
- Order by creation time or message severity (ascending or descending)
- Delete single messages
- Delete all messages
The number on the envelope icon represent the number of unread messages, when red, and the number of read messages when grey.
TIP
The backend processes automatically remove already read messages that are older than one day and unread messages that are older than three days, since the information contained in messages is closely related to the time of their creation.
1.2 The Filters section (2)
In the Filter section, you can select which rules you want to see.

1.2.1 General Filters (1)
- Tenant You can choose which Tenant’s rules you want to see.
1.2.2 Status Filter (2)
The Status Filter section allows to filter the displayed rules by their status.
You can switch the following false positive rules views
-
All Statuses Regardless of their status, all the defined rules will be displayed.
-
Active Only active rules will be displayed.
-
Suspended Only suspended rules will be displayed.
-
Expired Only expierd rules will be displayed.
1.2.3 Selected Rules (3)
Here you can see how many rules are matching your selection criteria.
1.3 The Rules section (3)
The Rules section contains the list of the rules matching your selection.

| Column | Description |
|---|---|
| Tenant | The reference Tenant |
| Status | The current rule status |
| Rule Name | The current rule name |
| Creator | The last alarm time, in chronological order, within the triage |
| Comment | The creator username |
| Creation Time | The rule comment |
| Expire Time | The rule expiration date and time, if was set at creation |
| Last Match | This is the date and time when the rule was last matched by an alarm |
| # Match | This is the total number of times a the rule was matched |
| Actions | This contains the available rules action. (see the Rule dashboard actions chapter below) |
2 Rules dashboard actions
There are five actions that can be taken against a Rule:
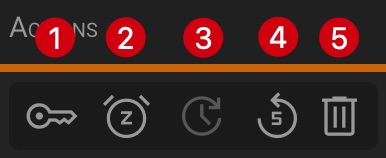
- Show Keys (1)
- Suspend (2)
- Resume (3)
- Reset (4)
- Delete (5)
2.1 Show Keys
Clicking the Show Keys button will expand the Rule Comment column, displaying the Rule SHA and Rule Keys for the current rule.

2.2 Suspend
Clicking the Suspend button will suspend the rule. This means that any alarms that match the rule will not be dismissed as false positives by the backend.
The suspended rules will turn dark orange to help distinguish them.

2.3 Resume
Clicking the Resume button will resume the rule.
2.4 Reset
Clicking the Reset button will reset the rule hits counter to 0 (zero).
2.5 Delete
When clicking the Delete button, the action box for the selected rule will change displaying a Delete/Cancel option 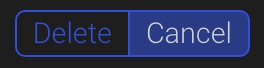 Click on the delete option to delete the rule.
TIP
This action cannot be undone once it is completed.